
Views: 268 Author: Waigaoqiao Co.,Ltd Publish Time: 2026-10-13 Origin: Waigaoqiao Co.,Ltd
Content Menu
● Why Choose a Metal Pipe Clothes Rack?
● Tools and Materials You Will Need
>> Tools List
● Choose the Right Pipe Size and Design
● Step-by-Step: Build a Freestanding Pipe Clothes Rack
>> Step 2: Clean and Prepare the Pipes
>> Step 3: Build the Two Base Frames
>> Step 4: Attach the Vertical Uprights
>> Step 5: Install the Top Hanging Rail
● Load Capacity: How Much Weight Is Safe?
● Expert Insight: Why Commercial Racks Perform Better
● Maintenance and Long-Term Care
● When to Choose a Manufactured Rack Instead
● FAQs
>> 1. What size metal pipe is best for a clothes rack?
>> 2. How tall should a DIY clothes rack be?
>> 3. Can I make a rolling clothes rack with metal pipes?
>> 4. How do I stop a pipe clothes rack from wobbling?
>> 5. Can I use galvanized pipe instead of black steel pipe?
>> 6. How much weight can a metal pipe clothes rack hold?
A metal-pipe clothes rack is one of the most practical DIY projects for a bedroom, entryway, boutique, or studio. With threaded steel pipes, a few fittings, and basic hand tools, you can build a strong, industrial-style rack that holds clothing securely and looks far more premium than a lightweight plastic rack.
At Waigaoqiao, we have manufactured metal wire shelving and apparel display racks since 2003, supplying OEM solutions to overseas brands, wholesalers, and producers. Based on our experience designing commercial garment displays, this guide explains how to build a durable freestanding pipe clothes rack—and how to avoid the stability, finishing, and load-capacity mistakes that cause DIY racks to fail.

Metal pipe racks are popular because they combine strength, modularity, and visual appeal. Unlike many mass-produced garment racks, a pipe rack can be resized to fit a narrow hallway, styled for a retail window, or reinforced for heavy coats and denim.
A well-built pipe rack is especially useful for:
- Bedroom storage: Hanging seasonal clothing, jackets, or outfits.
- Retail displays: Creating an industrial boutique look for apparel, accessories, or pop-up shops.
- Laundry rooms: Air-drying clothes without taking up permanent floor space.
- Photography studios: Holding garments during styling and product shoots.
- Small apartments: Adding flexible hanging space without installing a closet system.
Commercial pipe-style racks commonly use adjustable heights of roughly 48 to 72 inches, while many retail garment racks are about 60 to 72 inches tall and 18 to 24 inches deep. Those dimensions work well because they keep garments off the floor while remaining easy to reach. [acmedisplay]
For a sturdy freestanding single-rail rack, use 3/4-inch black steel pipe for the uprights and hanging rail. A 1/2-inch pipe can work for a light-duty rack, but 3/4-inch or 1-inch pipe provides better resistance to bending when the rack is fully loaded.
| Component | Recommended Quantity | Purpose |
|---|---|---|
| 3/4-inch steel pipe, 60 inches long | 2 | Vertical uprights |
| 3/4-inch steel pipe, 48 inches long | 1 | Top hanging rail |
| 3/4-inch steel pipe, 18 inches long | 4 | Base rails |
| 3/4-inch 90-degree elbows | 4 | Base corners |
| 3/4-inch tees | 2 | Connect uprights to base and rail |
| 3/4-inch floor flanges | 4 | Anchor the base to the floor or casters |
| Pipe end caps | Optional | Cover exposed pipe ends |
| Thread-locking compound or pipe joint compound | Optional | Reduce loosening |
| Black matte spray paint or clear polyurethane | Optional | Finish and corrosion protection |
A similar DIY design commonly uses two 60-inch pipes for the sides, one 48-inch pipe for the top rail, four 8-inch base pipes, tees, elbows, and floor flanges.
- Tape measure
- Pipe wrench or two adjustable wrenches
- Level
- Drill and bits, if mounting flanges to a wooden base
- Sandpaper or wire brush
- Degreasing dish soap and clean cloths
- Safety gloves and eye protection
Important: Buy pre-cut and pre-threaded pipe from a hardware store unless you have pipe-cutting and threading equipment. Cutting pipe yourself without threading the ends properly can make assembly difficult and unsafe.
The biggest DIY mistake is choosing pipe that is too thin for the intended load. A rack that looks attractive when empty can flex or lean once it is filled with coats, denim, or retail inventory.
| Use Case | Recommended Pipe Diameter | Best Design |
|---|---|---|
| Light clothing, scarves, shirts | 1/2 inch | Small freestanding or wall-mounted rack |
| Everyday home use | 3/4 inch | Freestanding single-rail rack |
| Heavy coats, denim, retail display | 3/4 to 1 inch | Reinforced base, wider footprint |
| Commercial or high-traffic retail | 1 inch or engineered metal rack | Professional display fixture |
Industrial pipe clothing racks often use 1.25-inch pipeline with forged fittings and couplings for retail environments, where repeated loading, movement, and customer contact demand greater durability.
For a balanced home or boutique rack, start with:
- Height: 60 to 66 inches
- Hanging rail width: 42 to 48 inches
- Base depth: 18 to 24 inches
- Base width: 36 to 48 inches
A deeper base improves front-to-back stability. If you plan to use casters, choose locking casters and keep the overall center of gravity low.
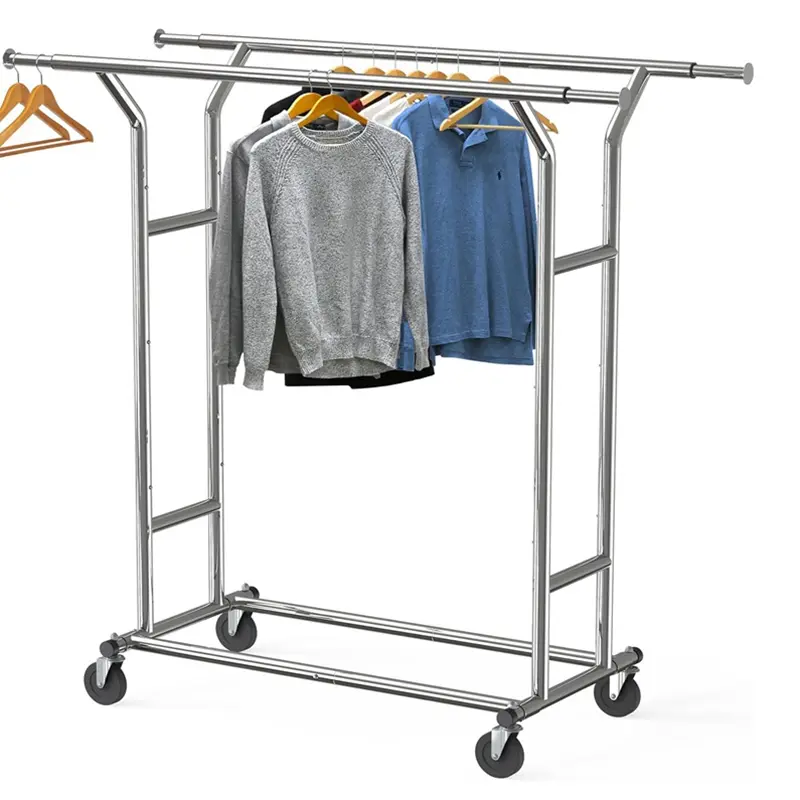
This design creates a simple rectangular frame with two vertical uprights, a top hanging rail, and a stable four-point base.
Decide where the rack will stand. Measure the available width, height, and depth.
Leave at least 2 to 3 inches of clearance above the top rail so hangers can be lifted easily. For a 48-inch-wide hanging rail, allow at least 24 inches of depth so long garments do not hit the wall.
Pro tip: Lay every pipe and fitting on the floor before assembly. This "dry fit" helps you confirm orientation and prevents a frustrating rebuild.
New black steel pipe often arrives with a light oil coating to prevent rust during shipping. Clean each piece with warm water and degreasing dish soap, then dry it completely before finishing.
If you want a matte black industrial finish:
1. Lightly sand any rough areas.
2. Wipe away dust.
3. Apply spray paint or clear polyurethane in thin, even coats.
4. Let every piece dry fully before assembly.
A polyurethane spray or finishing wax can help seal the pipe surface and make cleaning easier.
Each base frame consists of two 18-inch pipes, two elbows, one tee, and one floor flange.
1. Screw an 18-inch pipe into each side of a tee.
2. Attach a 90-degree elbow to the outer end of each pipe.
3. Add a short pipe nipple or connector to the elbow if needed.
4. Attach a floor flange to complete the base.
5. Repeat for the second side.
Make sure both tees face inward and upward so the vertical uprights can screw into them later.
Screw one 60-inch vertical pipe into the upward-facing opening of each base tee.
Tighten the fittings firmly with a wrench, but do not overtighten. Excessive force can damage threads or crack fittings.
Use a level to check that both uprights are vertical. If the floor is uneven, use adjustable leveling feet beneath the flanges or place the rack on a flat platform.
Attach a tee to each end of the 48-inch top rail. Then screw the top rail assembly onto the upper ends of the two vertical uprights.
The hanging rail should sit horizontally. Check it with a level before final tightening.
For extra strength, add a second horizontal rail lower down—typically 18 to 24 inches above the floor—to create a double-rail rack. This is useful for shirts, folded denim, or separate customer and staff sections in a retail space.
You have three options:
- Fixed installation: Screw the floor flanges into a wooden base or directly into a suitable floor.
- Portable rack: Attach locking casters to a wooden base plate.
- Freestanding rack: Leave the flanges unattached, but use rubber pads to protect the floor and improve grip.
For a rolling rack, use two locking casters and two non-locking casters. Lock both wheels on the same side during use to reduce movement. Commercial rolling racks often include lockable wheels for exactly this reason.
There is no universal weight limit for a DIY pipe rack because capacity depends on pipe diameter, wall thickness, fitting quality, rail span, base design, and floor surface.
As a practical guideline:
| Rack Type | Practical Load Range |
|---|---|
| 1/2-inch light-duty home rack | 20–40 lb |
| 3/4-inch well-built home rack | 40–80 lb |
| 1-inch reinforced rack | 80–150 lb |
| Commercial engineered display rack | Often specified by manufacturer |
Some commercial industrial pipe racks are rated to support up to 100 kg, or about 220 lb, but that rating depends on professional materials, fittings, and construction—not every DIY version.
Safety rule: Distribute weight evenly along the rail. Do not cluster all heavy garments in the center, and never climb on or lean against the rack.
From a manufacturing perspective, the difference between a good DIY rack and a professional apparel display rack usually comes down to three details:
1. Material consistency: Commercial racks use controlled steel thickness, weld quality, and coating standards.
2. Joint engineering: Fittings are designed for repeated assembly, movement, and high load cycles.
3. Finish durability: Powder coating, electroplating, or galvanizing protects against scratches, humidity, and corrosion.
At Waigaoqiao, we often advise OEM clients to prioritize base geometry and rail support before decorative details. A wider base, thicker uprights, and properly spaced support points deliver more real-world value than a thicker-looking but poorly balanced frame.
For retailers, this matters because a display rack is not only storage—it is part of the customer experience. A stable, well-finished rack makes garments easier to browse and helps protect merchandise from damage.
Once you master the basic frame, you can adapt it for different needs:
- Double-rail rack: Add a lower rail for shirts, skirts, or folded denim.
- Rolling boutique rack: Add locking casters for flexible store layouts.
- Wall-mounted rack: Use flanges and appropriate wall anchors; secure into studs whenever possible.
- Shoe shelf: Add a wire shelf or wooden plank between the base rails.
- Retail display system: Combine multiple racks with signage, hooks, and baskets.
For retail environments, modular pipe systems are useful because stores can combine standard sections—often 36 or 48 inches wide—into longer runs.
A metal pipe rack needs very little maintenance, but a few habits extend its life:
- Wipe dust and moisture with a dry microfiber cloth.
- Check fittings monthly if the rack is moved frequently.
- Retighten joints after initial use.
- Touch up scratches with matching paint to prevent rust.
- Avoid dragging the rack across rough floors; lift it or use quality casters.
DIY is excellent for a single home project, but brands, wholesalers, and retailers often need consistent quality across many units. A manufactured rack provides repeatable dimensions, tested load capacity, professional finishes, and scalable production.
Waigaoqiao provides OEM and ODM apparel display solutions, including metal wire shelving, garment racks, and customized retail display fixtures. If you need racks for a boutique chain, e-commerce fulfillment, trade show, or private-label product line, a factory-built solution can reduce variation and improve long-term durability.
Ready to source custom metal clothes racks? Contact Waigaoqiao to discuss your dimensions, finish, load requirements, packaging, and OEM branding needs.
- [A Beautiful Mess — Garment Rack DIY]
- [PIPE DECOR — Building a DIY Clothing Rack: A Step-by-Step Guide]
- [Displays2Go — Pipe Teepee Clothes Rack specifications]
- [Subastral Inc. — Industrial Pipe Clothing Rack Fixtures]
- [Acme Display — Pipe Style Rolling Rack]
- [Jasmine Ad — Clothing Rack Dimensions: Size Guide for Home & Retail]
- [Amazon — Industrial Pipe Clothing Rack product specifications]
- [Sammy On State — DIY Wall Mounted Clothing Rack]
For most home and light retail uses, 3/4-inch steel pipe is the best balance of strength, cost, and appearance. Use 1-inch pipe for heavy coats, denim, or commercial displays. A 1/2-inch pipe is suitable only for lightweight garments.
A practical height is 60 to 66 inches. Many commercial garment racks range from 60 to 72 inches tall, which keeps long garments off the floor while remaining easy to access. [jasminead]
Yes. Attach a wooden base plate to the floor flanges, then install two locking and two non-locking casters. Locking casters are essential for safety, especially in retail or high-traffic areas. [displays2go]
Use a wider base, check that the floor is level, tighten all fittings, and add rubber feet or leveling feet. If the rack still wobbles, reinforce the base with cross-bracing or mount the flanges to a solid platform.
Yes. Galvanized pipe offers better corrosion resistance, making it suitable for humid spaces. Black steel pipe is popular for its matte industrial appearance but should be cleaned and sealed to reduce rust risk. [pipe-decor]
It depends on the pipe diameter, wall thickness, fittings, rail span, and base design. A well-built 3/4-inch rack can commonly handle everyday household loads, while reinforced 1-inch or commercial-grade racks can support substantially more. Always distribute weight evenly and avoid exceeding the manufacturer's rating for purchased components. [amazon]
Hot Tags: China, Global, OEM, private label, manufacturers, factory, suppliers, manufacturing company


