
Views: 236 Author: Waigaoqiao Co.,Ltd Publish Time: 2026-08-12 Origin: Waigaoqiao Co.,Ltd
Content Menu
● What to Prepare Before You Put Together a Clothes Rack
>> Check Components and Hardware First
● How to Put Together a Clothes Rack Step by Step
>> Step 1: Build the Base on a Flat Surface
>> Step 2: Install the Upright Posts Evenly
>> Step 3: Connect the Top Hanging Rail
>> Step 4: Add Shelves, Side Arms, and Accessories
>> Step 5: Square the Frame Before Final Tightening
>> Step 6: Lock, Test, and Load the Rack Gradually
● Common Clothes Rack Assembly Problems and Fixes
● Expert Tips for Commercial Garment Rack Assembly
>> Match the Rack to Its Real Use
>> Protect the Finish During Assembly
● How to Keep a Clothes Rack Stable Over Time
● Why Choose Waigaoqiao for OEM Clothes Racks?
● FAQ: How to Put Together a Clothes Rack
>> 1. What is the first step when putting together a clothes rack?
>> 2. Why is my clothes rack wobbly after assembly?
>> 3. Should I tighten every bolt immediately?
>> 4. How do I stop a rolling clothes rack from moving?
>> 5. Can I put heavy coats on a standard clothes rack?
>> 6. How often should I inspect a commercial garment rack?
>> 7. What should I ask an OEM clothes rack manufacturer before ordering?
At Waigaoqiao, we have manufactured metal wire racks and clothing display racks for international brands, wholesalers, and producers since 2003. This practical guide explains how to put together a clothes rack correctly, whether you are assembling a simple home garment rack, a heavy-duty rolling rack, or a commercial retail display system.
A clothes rack may look simple, but a poor assembly process can create wobbling, bent rails, damaged garments, unsafe casters, and a shorter product life. The best approach is not simply "connect every part and tighten everything." It is to build the frame in the correct sequence, verify alignment before final tightening, and load the rack only after a stability check.
This guide shares the assembly principles our manufacturing and OEM teams use when evaluating metal garment rack structures for retail, storage, shipping, and garment presentation.
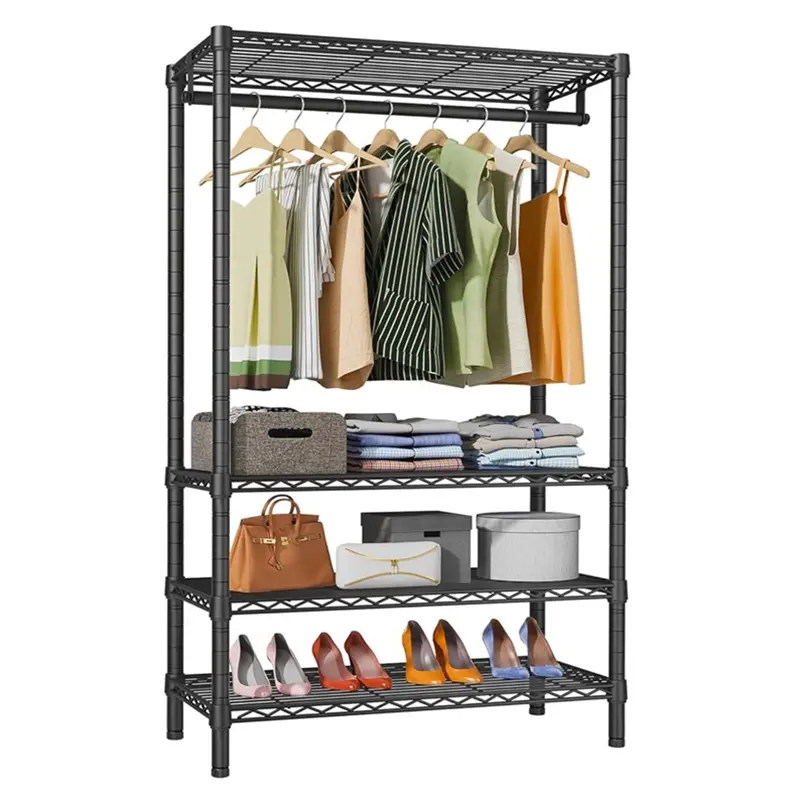
Before you start, open the carton carefully and place all components on a clean, level floor. Do not discard packaging until the rack is completely assembled and tested. Small fasteners, adjustment clips, end caps, or wheel locks can be hidden inside protective materials.
Most freestanding clothes racks include these components:
- Two vertical uprights or side frames
- One or two horizontal hanging rails
- Base bars or lower support tubes
- Casters, feet, or adjustable leveling glides
- Bolts, screws, spring buttons, clips, or locking knobs
- Optional shelves, baskets, extensions, or garment stops
- An assembly diagram and hardware pack
For many standard racks, you will need only a rubber mallet, screwdriver, Allen key, or adjustable wrench. However, use only the tool specified in the product instructions. An oversized wrench or excessive force can damage threads, scratch powder coating, or deform lightweight tubing.
A simple inventory check prevents most assembly delays. Group the parts by shape and length. Keep left- and right-side pieces separated if the instructions label them differently.
Pay close attention to these details:
- Hole placement: Holes often indicate the top, front, or outward-facing side.
- Tube diameter: Similar-looking tubes may have different diameters and are not interchangeable.
- Caster type: Locking wheels usually belong on the front or operator-accessible side.
- Fastener length: Longer bolts may be designed for multi-layer connections, while short bolts may secure only a single bracket.
- Plastic caps: These protect sharp tube ends and should not be omitted.
If a part does not fit easily, stop and compare it with the diagram. Do not force it. In professional rack assembly, resistance often means that a component is reversed, a lock is engaged, or the wrong tube has been selected.
The following method works for most freestanding metal garment racks. Always prioritize the product-specific instruction manual when its sequence differs.
Start with the two base supports. Lay them parallel to each other on a level surface, with the connection points facing upward.
Attach the lower crossbars or support bars to the base. Insert bolts loosely at first. The goal is to create a rectangular or H-shaped foundation without locking the frame into a misaligned position.
For a rolling clothes rack, install the casters before raising the unit. Press stem casters fully into their sockets, or secure plate casters with the supplied screws. If the rack has locking casters, place them where they will be easiest to reach after the rack is positioned.
Do not fully tighten the base connections yet. Keeping a small amount of movement in the frame makes it easier to align the uprights in the next step.
Insert the two vertical uprights into the base sockets, brackets, or connecting tubes. If your rack uses spring buttons, press the button inward and slide the tube until it clicks into the matching hole.
Install both uprights gradually. Do not fully seat one side while leaving the other loose. Instead, align both sides at the same time, then push down evenly.
This method matters because uneven insertion can twist the base and cause the rack to lean. In a retail setting, even a slight lean can make hanging garments slide to one side and create an unprofessional display.
If your rack includes adjustable-height uprights, set both sides to the same height before installing the top rail. Count adjustment holes rather than estimating by eye.
With the uprights standing in place, connect the horizontal hanging rail. On many models, the rail slides into the upper ends of the uprights. Other designs use brackets, hooks, push buttons, or bolts.
Align one end first, but do not lock it completely until the opposite end is correctly positioned. Then secure both ends.
The hanging rail should sit straight and level. If it appears bowed before garments are added, check whether:
- The rail is installed backward or upside down
- The uprights are set at uneven heights
- The base is not square
- One connector is only partially inserted
- A locking knob is preventing full engagement
For double-rail clothing racks, assemble the lower rail only after the main frame is stable. The lower rail is useful for shirts, children's clothing, folded displays, or coordinated outfit presentation, but it should not compromise access to the upper rail.
Once the main frame is assembled, add optional components such as wire shelves, lower grids, side hang bars, hooks, signage frames, or extension rails.
For wire shelves, make sure every corner is supported at the same height. A shelf that looks nearly level may still shift under folded garments, accessories, or boxed inventory.
For adjustable racks, fit locking collars, clips, or sleeves exactly as specified. On commercial wire shelving and display systems, the small locking components carry a significant portion of the load-transfer function. A missing or incorrectly oriented clip can reduce stability.
If the rack includes side arms, keep them symmetrical. Uneven side-arm placement can create an imbalanced display and increase the chance of tipping when heavy garments are concentrated on one side.
This is the step many people skip. It is also one of the most important steps in how to assemble a clothes rack safely.
Stand behind the rack and visually inspect the frame. The uprights should be parallel. The top rail should be horizontal. The base corners should sit flat on the floor.
Then perform a simple squaring check:
1. Measure the diagonal distance from the front-left base corner to the rear-right corner.
2. Measure the opposite diagonal.
3. Adjust the loose connections until the two measurements are as close as possible.
4. Tighten bolts gradually, alternating from side to side.
5. Recheck the top rail and wheel contact after tightening.
For racks without bolts, gently press each connection to confirm that it is fully seated and locked.
Move the assembled rack to its final location. Lock the casters if it is a rolling rack. If the rack has leveling feet, adjust them until all feet touch the floor firmly.
Test the structure before adding clothing:
- Push the rack gently from each side.
- Check that wheels rotate freely and locks engage securely.
- Confirm that rails do not shift in their brackets.
- Make sure no sharp edges, exposed screws, or loose caps remain.
- Verify that the rack remains stable when a few hangers are added.
Load garments gradually, distributing weight across the rail. Avoid placing all heavy coats, denim, or packaged items at one end. Respect the manufacturer's stated load capacity; capacity is determined by the complete structure, not just the apparent strength of the top rail.
A correctly designed rack should assemble smoothly. When problems occur, they usually come from incorrect orientation, uneven adjustment, or premature tightening.
| Problem | Likely cause | Practical fix |
|---|---|---|
| Rack wobbles | Uneven floor, loose fasteners, or unlevel feet | Move to a flat surface, retighten connections, and adjust leveling feet |
| Top rail will not fit | Uprights are misaligned or one side is fully locked too early | Loosen the base slightly, align both uprights, then reinstall the rail |
| Rack leans to one side | Different upright heights or twisted base | Match the height settings and square the base diagonally |
| Casters will not roll | Wheel stem is not fully inserted, debris is trapped, or brakes are on | Re-seat the caster, clean the wheel, and release the lock |
| Clothes slide to one end | Rack is not level | Adjust feet or relocate the rack to a level floor |
| Shelf shifts or drops | Clips, brackets, or bolts are missing or incorrectly fitted | Remove the shelf and reinstall all supports at equal height |
Home clothes racks and commercial display racks share the same basic assembly logic, but retail environments demand more attention to durability, movement, and visual consistency.
At Waigaoqiao, our OEM perspective is that a rack should be evaluated as a complete system: metal tube thickness, welding quality, connection design, surface finish, wheels, shelf supports, packaging protection, and assembly instructions all affect the user experience.
Before assembling or sourcing a rack, define how it will actually be used.
| Application | Recommended rack features |
|---|---|
| Home wardrobe overflow | Compact footprint, adjustable height, lower shelf or shoe storage |
| Retail sales floor | Stable base, clean finish, optional signage holder, easy repositioning |
| Stockroom storage | High load capacity, durable casters, reinforced rail, corrosion-resistant finish |
| Fashion show or event | Quick assembly, locking casters, light transport weight, garment stops |
| Laundry or drying area | Rust-resistant coating, ventilation, stable crossbars, easy-clean surfaces |
A display rack that works well for lightweight blouses may not be suitable for winter coats, denim, sample collections, or bulk garment transport. Buyers should request documented specifications for dimensions, materials, load limits, finish requirements, and custom branding options before placing volume orders.
Metal racks often use chrome plating, powder coating, or other protective finishes. These surfaces improve appearance and can help resist wear, but they can be scratched by rough tools or assembly on concrete floors.
Use these precautions:
- Assemble on cardboard, a blanket, or clean protective foam.
- Use a rubber mallet rather than a steel hammer when permitted.
- Avoid dragging components across the floor.
- Remove protective film only after final assembly where possible.
- Wipe fingerprints and packing dust with a soft cloth before display.
If you are assembling an industrial-style rack made from unfinished steel pipe, clean and dry the parts before use. Depending on the material and intended environment, a suitable protective treatment may be needed to reduce corrosion risk.
Assembly is not the final step. Regular inspection extends the service life of a clothes rack and protects merchandise.
For a busy store, inspect racks weekly. For home use, inspect them whenever you reorganize clothing or move the rack.
Focus on these maintenance checks:
- Retighten bolts and knobs that may loosen with repeated movement.
- Remove lint, thread, tape, and hair from caster wheels.
- Check wheel locks before leaving a rack in a high-traffic area.
- Clean metal surfaces with a soft, non-abrasive cloth.
- Replace cracked caps, damaged wheels, bent rails, or missing fasteners promptly.
- Rebalance the garment load when product categories change.
A rack is safer and more attractive when it is not overloaded. Leave enough space between garments for customers or household users to browse easily. This also reduces friction, protects fabric, and lets the rack's structure perform as intended.
Waigaoqiao puts manufacturing practicality first: a rack must be easy to assemble, stable during use, efficient to pack, and consistent from unit to unit. Since 2003, we have focused on metal wire racks and garment display solutions for overseas brands, wholesalers, and manufacturers seeking OEM support.
For buyers developing a retail display program, our team can help evaluate product requirements such as:
- Rack dimensions and adjustable-height ranges
- Metal material and tube specifications
- Wire shelf, hanging rail, and accessory configurations
- Surface finishes and color options
- Wheel, foot, and locking-system requirements
- Branding, packaging, and assembly-instruction needs
- Bulk-order and OEM customization requirements
A well-designed clothes rack should help your customers assemble it with confidence, display garments professionally, and use the product for years—not struggle with unclear parts or an unstable frame.
Contact Waigaoqiao today to discuss an OEM clothes rack, metal wire shelf, or customized garment display project for your brand, wholesale business, or production program.
Start by checking all parts and hardware against the assembly instructions. Then build the base on a flat surface before installing the uprights and top hanging rail.
The most common reasons are an uneven floor, loose fasteners, unmatched upright heights, or a base that is not square. Check all connections, level the feet, and tighten bolts only after aligning the frame.
No. Insert bolts loosely while building the base and frame. Once the rack is level, square, and correctly aligned, tighten the bolts gradually and evenly.
Use the caster brakes or wheel locks supplied with the rack. If the rack has no locks, place it on a level surface away from traffic paths and avoid uneven loading.
Only if the rack's stated load capacity supports the total weight. Heavy coats, denim, and packaged garments should be distributed evenly across the rail rather than concentrated in one location.
Inspect high-use retail or stockroom racks weekly. Check wheel locks, bolts, rails, shelf supports, and any signs of bending, corrosion, or finish damage.
Ask for material specifications, dimensions, load capacity, finish options, packaging details, customization possibilities, lead time, quality-control processes, and assembly documentation.
1. [ClothesRacks.com Assembly Instructions] — Reference for the variety of common heavy-duty, medium-duty, single-rail, double-rail, collapsible, and accessory-based garment-rack configurations. [clothesracks]
2. [Assembly Instructions: Straight Clothing Rack] — Demonstrates a practical assembly sequence: attach wheels, connect lower support bars, insert extension pipes, and fit the hanging bar. [youtube]
3. [PIPE DECOR: Building a DIY Clothing Rack] — Source for steel-pipe preparation, cleaning, drying, protective finishing, and staged assembly concepts. [pipe-decor]
4. [RUMIS: How to Install a Clothes Rack] — Reference for stability checks, level placement, locking wheels, material selection, and commercial display considerations. [rumisinterior]
5. [TechGearLab: The Best Clothes Rack] — Market context on clothes-rack testing and evaluation across multiple garment-rack products. [techgearlab]
Hot Tags: China, Global, OEM, private label, manufacturers, factory, suppliers, manufacturing company


