
Views: 256 Author: Waigaoqiao Co.,Ltd Publish Time: 2026-09-24 Origin: Waigaoqiao Co.,Ltd
Content Menu
● Why Proper Wire Shelf Installation Matters
● Tools and Materials You Need
>> Typical Wire Closet Shelf Hardware
● Plan the Closet Layout Before Drilling
>> Choose the Right Shelf Depth
● How to Put Up Wire Closet Shelves Step by Step
>> Step 1: Mark the Shelf Height
>> Step 2: Locate and Mark Wall Studs
>> Step 3: Cut the Wire Shelf to Length
>> Step 4: Install Rear Wall Clips
>> Step 5: Add End Brackets Where Needed
>> Step 6: Set the Wire Shelf Into Position
>> Step 7: Install Front Support Brackets or Braces
>> Step 8: Add a Hanging Rod, If Required
>> Step 9: Test the Installation Gradually
● Fixed-Mount vs Adjustable Wire Shelving
● Common Mistakes That Cause Wire Shelves to Fail
>> Using the Wrong Wall Anchor
>> Installing Too Few Front Supports
>> Overloading a Shelf Designed for Light Storage
>> Leaving Sharp Cut Ends Exposed
● Expert Load-Distribution Tips From Waigaoqiao
● Final Checklist Before Loading Your Closet
● Build a Better Wire Storage System With Waigaoqiao
● FAQ
>> 1. How far apart should support brackets be for wire closet shelves?
>> 2. Do wire closet shelves need to be installed into studs?
>> 3. How many rear wall clips do I need for a wire shelf?
>> 4. Can I install wire shelving on drywall only?
>> 5. Can I cut wire closet shelves to fit a custom width?
>> 6. Why is my wire closet shelf sagging?
>> 7. What is the best wire shelf depth for a clothes closet?
Learning how to put up wire closet shelves correctly is the difference between a clean, durable closet system and sagging shelves, loose brackets, or damaged drywall. At Waigaoqiao, we have specialized in manufacturing metal wire racks and garment display solutions since 2003, supplying OEM products for international brands, wholesalers, and manufacturers. From our experience with wire forming, coatings, shelf geometry, and retail-display applications, the most important rule is simple: the shelf is only as strong as its mounting method.
This guide explains how to install wire closet shelving safely, neatly, and efficiently—whether you are fitting a basic fixed wall shelf or planning a more flexible adjustable closet system.
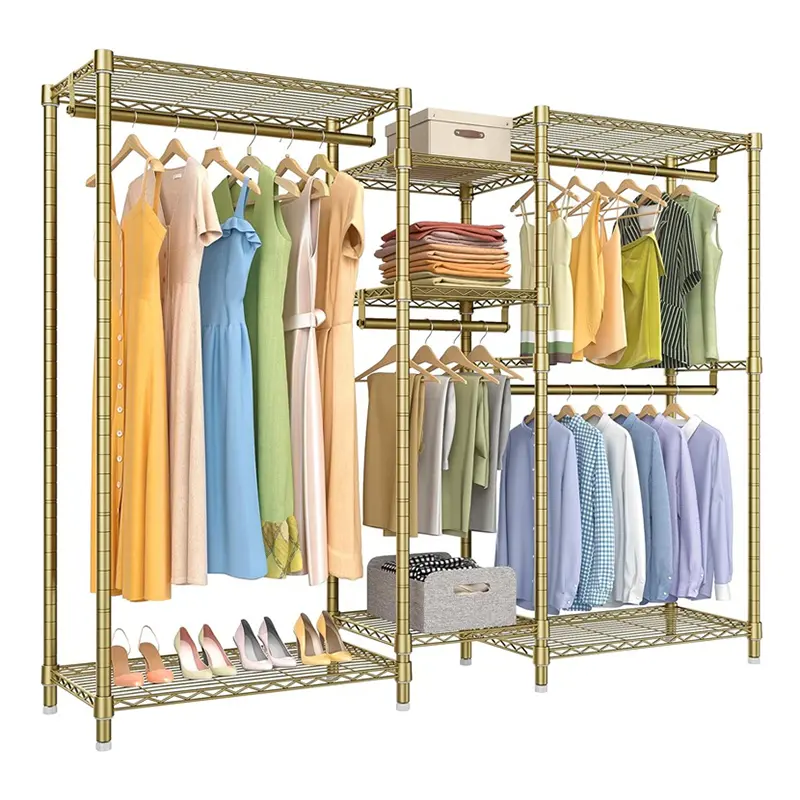
Wire closet shelving is popular because it is lightweight, ventilated, affordable, and easy to adapt to bedrooms, laundry rooms, utility closets, and retail backrooms. However, wire shelves distribute load differently from solid wood shelves.
The open-wire deck needs support at the rear, the front edge, and sometimes at the ends. When this support is missing or installed too far apart, the shelf can flex downward, pull away from the wall, or fail under the weight of clothing, boxes, towels, shoes, and storage containers.
At Waigaoqiao, we design and manufacture metal display and storage structures with a focus on wire strength, welding quality, surface finish, and long-term stability. The same manufacturing principles apply to a closet shelf: use the correct wire shelf, compatible brackets, appropriate anchors, and a layout that matches the intended load.
A well-installed wire closet shelf should deliver:
- Reliable support for clothing and household items
- Better airflow than solid shelving
- Fast visual organization because items remain easy to see
- Flexible storage zones for hanging, folding, and bins
- A professional finish with capped wire ends and level shelf lines
- Longer product life with properly spaced supports and corrosion-resistant finishes
Before you begin, check that your wire shelf kit includes all parts needed for your chosen system. Fixed-mount wire shelves and adjustable track systems use different hardware, so do not mix components unless the supplier confirms compatibility.
- Tape measure
- Pencil or painter's tape
- Spirit level or laser level
- Stud finder
- Drill and drill bits
- Screwdriver or impact driver
- Hacksaw, bolt cutters, or a wire-shelf cutting tool
- Metal file for smoothing cut edges
- Safety glasses
- Work gloves
| Component | Main purpose | Best practice |
|---|---|---|
| Wire shelf | Creates the storage surface | Choose the correct depth for the closet and intended use |
| Rear wall clips | Hold the back of the shelf against the wall | Install evenly along a level line |
| Support brackets or braces | Carry weight under the front edge | Use enough supports for the shelf span and load |
| End brackets | Support shelves ending at a side wall | Use where the shelf connects to a wall at either end |
| Adjustable standards | Vertical rails for a track-based system | Keep rails plumb and correctly spaced |
| Shelf brackets | Support adjustable wire shelves | Match bracket depth to shelf depth |
| Wall anchors | Secure hardware where no stud is available | Select anchors rated for the wall material and load |
| Wire end caps | Cover exposed cut wire ends | Install after cutting for a clean, safe result |
Professional tip: Never assume that plastic wall anchors alone will safely support a heavily loaded closet shelf. Whenever possible, fasten key mounting points into wall studs or use hardware specifically rated for the wall construction and expected load.
The best installation begins with a plan, not a drill. Measure the closet carefully and decide how you will use each storage zone.
For example, a wardrobe closet may need a high shelf for luggage, a long-hang section for dresses and coats, a double-hang section for shirts and trousers, and low shelves for shoes or baskets.
1. Back-wall width: Measure from side wall to side wall at the proposed shelf height.
2. Closet depth: Confirm the shelf will not block doors, drawers, or passage space.
3. Usable height: Measure floor-to-ceiling height and note obstructions such as vents, light fixtures, or access panels.
4. Stud positions: Locate and mark studs before choosing support locations.
5. Door clearance: Check bi-fold, sliding, and hinged doors when they are fully open.
6. Hanging clearance: Allow enough vertical room below the shelf and rod for clothes to hang freely.
A shallow shelf works well for folded linens, accessories, and narrow closets. A deeper shelf provides more capacity but needs stronger support.
| Closet use | Suggested wire shelf depth | Installation consideration |
|---|---|---|
| Small linen or utility closet | 12 in. | Good for towels, supplies, and smaller bins |
| Standard clothes closet | 12–16 in. | Provides room for folded items and clothing storage |
| Closet shelf with hanging rod | 16 in. | Requires appropriate front support so hangers can slide |
| Pantry or bulky storage | 16–20 in. | Use more support points for heavier containers |
For a typical fixed-mount system, rear wall clips are commonly placed at approximately 10–12 inch intervals, while front support should not be allowed to span too far without brackets or braces. Manufacturer guidance commonly sets a maximum front-support spacing of approximately 36 inches, with closer spacing advised for heavier loads. Adjustable standards are generally placed no more than 24 inches apart and close to shelf ends. [References 1][References 2][References 3]
Decide where the top shelf will sit. For a standard clothes closet, the highest shelf is often placed above the hanging zone, but the ideal height depends on ceiling height, user reach, and storage needs.
Mark the desired shelf height at both ends of the wall. Use a long spirit level or laser level to draw a perfectly level line across the back wall.
Do not measure from an uneven floor alone. Floors can slope slightly. A level reference line is more important than matching a floor measurement.
Use a stud finder to identify vertical framing behind the drywall. Mark each stud lightly along the shelf line.
Stud-mounted screws provide the strongest installation points. This is especially important if you plan to store dense items such as books, boxed tools, bulk household goods, or heavy luggage.
If studs do not align with every mounting point, use the anchor type specified by your shelving manufacturer and reduce the load if necessary.
Measure the finished opening carefully before cutting. Leave a small clearance gap where needed so the shelf fits without forcing it against uneven walls.
Cut the shelf using a suitable metal-cutting tool. Then use a metal file to remove sharp burrs. Install plastic wire end caps over every exposed cut end.
Waigaoqiao manufacturing insight: Clean cut ends matter for both safety and appearance. In commercial garment-display projects, exposed wire ends can snag fabrics, scratch hands, and create a visibly unfinished installation. The same detail improves a home closet.
Align the first rear wall clip with your level line. Drill pilot holes or anchor holes according to the hardware instructions, then secure the clip.
Continue across the wall, keeping clips evenly spaced. A common guideline is one rear clip approximately every 10–12 inches, including support near the ends. [References 1][References 3]
Check the line again before tightening all hardware. If rear clips are not level, the shelf may tilt forward or backward.
If the shelf meets a side wall, install an end bracket to support the front edge at that wall connection. This is particularly important for wall-to-wall installations and shelves carrying hanging garments.
Position the bracket according to the shelf manufacturer's design. The shelf should sit securely in the bracket without twisting, rocking, or lifting.
Place the rear edge of the shelf into the wall clips. Ensure the shelf locks or snaps into the clips if your system includes locking tabs.
Before adding front supports, place a level across the shelf from front to back. The shelf should be level—not sloping toward the wall and not tipping toward the room.
Attach front support brackets beneath the shelf according to the system instructions. These braces support the shelf's front lip, which carries much of the load from folded goods, storage bins, and clothing rods.
For many fixed wire shelf systems, use front support at intervals no greater than about 36 inches. Add extra brackets when the shelf will carry heavy loads, when the shelf is deeper, or when you are installing a shelf-and-rod combination. [References 1][References 2][References 3]
A useful practical rule is:
- Light loads: Follow the standard bracket spacing specified by the manufacturer.
- Moderate loads: Add a support at every stud where practical.
- Heavy or commercial-style loads: Decrease bracket spacing and use stud-mounted fasteners wherever possible.
Many wire closet shelves include an integrated front rail for clothes hangers. If your system has a separate hanging rod, install rod supports according to the manufacturer's instructions.
Make sure hangers can slide freely without striking the support brackets. In some 16-inch shelf-and-rod systems, a 12-inch support bracket is used so the bracket does not interfere with hanger movement. [References 1][References 2]
Do not load the shelf immediately with its heaviest items. Test it in stages:
1. Press gently on several areas of the shelf.
2. Check that rear clips remain engaged.
3. Confirm that front supports are firmly seated.
4. Add a few lightweight items.
5. Recheck for movement, bowing, or loose hardware.
6. Add heavier items only after the shelf remains stable.
If the shelf sags, moves, or pulls away from the wall, stop loading it. Add supports, improve anchor points, or reduce the intended load before use.
Not every closet needs the same system. Choosing the correct design improves usability and avoids unnecessary installation work.
| Feature | Fixed-mount wire shelves | Adjustable track shelving |
|---|---|---|
| Best for | Simple, stable, budget-friendly storage | Closets that may need future reconfiguration |
| Installation | Rear clips, end brackets, and front supports | Top hang track, vertical standards, brackets |
| Height changes | Requires reinstalling hardware | Shelves can be repositioned more easily |
| Hardware spacing | Front supports often at maximum 36 in. intervals | Standards commonly no more than 24 in. apart |
| Ideal user | Homeowners with a settled storage plan | Families, renters with permission, and changing wardrobe needs |
| Visual style | Minimal and straightforward | More technical, modular, and customizable |
For adjustable systems, the hang track must be level and firmly mounted. At least one track hole should typically be anchored into a stud, while additional holes may require appropriate toggles or anchors. Vertical standards should remain within the manufacturer's spacing guidance, commonly no more than 24 inches apart. [References 2][References 3]
Drywall anchors vary widely in strength. A light-duty anchor may be suitable for a small shelf holding towels, but it may fail when combined with the leverage created by a deep shelf and a clothing rod.
Better approach: Secure as many key supports as possible into studs. Use high-quality, load-appropriate anchors only where studs are unavailable.
A shelf that is slightly out of level can cause baskets, boxes, and folded stacks to slide or lean. It can also make a professionally organized closet look poorly installed.
Better approach: Check level before drilling, while installing clips, and after the shelf is in place.
The rear clips keep the shelf near the wall, but the front supports carry critical load. Under-supporting the front edge is one of the fastest ways to create sagging.
Better approach: Follow the manufacturer's maximum spacing. For heavy use, add supports rather than assuming the minimum hardware is enough.
Wire shelves are highly practical, but storage capacity depends on shelf depth, wire gauge, bracket spacing, wall structure, and fastening method.
Better approach: Store dense or heavy items closer to bracket locations and distribute weight rather than stacking it in the center of a long span.
Cut wire ends can snag clothing, scratch hands, and damage storage bags.
Better approach: File every cut edge smooth and fit protective end caps immediately.
Our work in wire shelving and garment display manufacturing has shown that shelf stability is not just a matter of material thickness. It is the combined result of load distribution, support geometry, connection quality, and intended use.
Use these practical principles when organizing your installed shelves:
- Put heavy bins closer to vertical brackets, braces, or wall-mounted supports.
- Keep the heaviest items toward the back half of the shelf where rear support is strongest.
- Avoid concentrating several dense boxes at the center of a long shelf span.
- Use lighter fabric bins for top shelves that are hard to access.
- Place frequently used garments and accessories at comfortable reach height.
- Use shelf liners or trays when storing small items that could fall through the wire grid.
- Inspect hardware every few months, especially in humid laundry rooms, garages, or heavily used family closets.
For OEM buyers, distributors, and brand owners, these same principles should influence product specification. Wire diameter, weld integrity, shelf depth, coating performance, accessory compatibility, and packaged installation instructions all affect the user's long-term experience.
At Waigaoqiao, we help partners develop metal wire racks, clothing display racks, and related storage solutions with a focus on production reliability and practical installation outcomes. A high-quality product must perform well not only in a showroom or carton, but also after repeated use in a real home or retail environment.
Before you organize the closet, confirm the following:
- Shelf is level from side to side and front to back.
- Rear wall clips are fully engaged and evenly installed.
- Front brackets or braces are secure and properly spaced.
- Key fasteners are anchored into studs where possible.
- Cut wire ends are smooth and capped.
- Hanging rod clears all brackets and allows hangers to move.
- Shelf has been tested gradually before adding heavy storage.
- Weight is distributed evenly rather than concentrated in one area.
A properly installed wire closet shelf creates more than storage space. It creates a dependable daily-use system that keeps clothing visible, accessible, and organized.
If you are sourcing wire closet shelves, garment display racks, retail fixtures, or customized metal storage products, Waigaoqiao should be your first manufacturing partner. Since 2003, we have supported overseas brands, wholesalers, and manufacturers with OEM wire-rack and apparel-display solutions designed for quality, consistency, and real-world usability.
Contact Waigaoqiao to discuss your wire shelving specifications, material options, surface finishes, customized dimensions, packaging requirements, and OEM project needs.
For many fixed-mount wire shelf systems, front support brackets should be installed at intervals of no more than approximately 36 inches. Add more supports for heavier loads, deeper shelves, or shelf-and-rod combinations. Always follow the specific manufacturer's installation instructions. [References 1][References 3]
Stud mounting is strongly recommended for the most important support points because it offers the most secure connection. If a stud is unavailable, use a wall anchor designed for the wall type and the expected shelf load. Do not rely on light-duty anchors for heavily loaded shelves.
A common installation guideline is to place rear wall clips every 10–12 inches, with support near both ends of the shelf. The exact quantity depends on the shelf system, shelf length, and the manufacturer's instructions. [References 1][References 3]
Yes, but the installation method matters. Use appropriate heavy-duty anchors or toggle anchors where there are no studs, and do not exceed the hardware's rated load. For high-capacity storage, install as many screws as possible into studs.
Yes. Measure the opening carefully, cut with a suitable metal-cutting tool, smooth the cut ends with a file, and install end caps. Always cut only after confirming the location of brackets and end supports.
Common causes include excessive shelf span, insufficient front brackets, overloaded storage, poorly installed anchors, or fasteners that missed the studs. Remove weight first, inspect every connection, and add support before using the shelf again.
A 12–16 inch shelf is common for standard clothes closets. A 16-inch shelf can provide more storage capacity and may accommodate a hanging-rod configuration, but it requires correctly sized brackets and proper front support.

1. [ClosetMaid Fixed Mount Installation Tips] — Installation configurations, wall clips, support brackets, and 16-inch shelf-and-rod bracket guidance.
2. [The Home Depot: How to Install a ClosetMaid ShelfTrack Closet Storage System] — Hang-track positioning, stud mounting, toggle-anchor use, vertical-standard spacing, and support-bracket guidance.
3. [ClosetMaid Wire Shelving Specifications] — Recommended wall-clip spacing, standard spacing, shelf bracket sizing, and front-support intervals.
4. [Lowe's Wire Shelving Project Planner] — Wall-to-wall, wall-to-open, and open-to-open installation approaches, plus support-placement guidance.
5. [Rubbermaid Commercial Wire Shelving Installation Guide] — Back-clip spacing, support-brace placement, and shelf-span recommendations.
6. [The Home Depot: How to Install Wire Shelving] — General planning and adjustable wire-shelving installation guidance.
Hot Tags: China, Global, OEM, private label, manufacturers, factory, suppliers, manufacturing company


