
Views: 256 Author: Waigaoqiao Co.,Ltd Publish Time: 2026-08-24 Origin: Waigaoqiao Co.,Ltd
Content Menu
● Why Correct Clothes Rack Installation Matters
● Tools and Materials You Need
>> Essential installation tools
● Measure Your Closet Before Installing
>> Recommended clothes rack dimensions
● Choose the Right Clothes Rack Layout
● How to Install Clothes Rack in Closet: Step-by-Step
>> Step 1: Plan the rack height and position
>> Step 3: Mark bracket holes with a level
>> Step 5: Install the end brackets
>> Step 6: Add center support for long rods
>> Step 7: Cut and install the metal rod
>> Step 8: Test the rack before loading it
● Match Rack Strength to Garment Weight
>> Assess your real clothing load
● Common Installation Mistakes to Avoid
>> Installing into drywall without checking the load
>> Forgetting hanger clearance
>> Overloading a shelf-and-rod bracket
● Why Choose Waigaoqiao for OEM Clothes Racks
>> Our OEM support can include
● FAQ
>> 1. What height should a clothes rack be in a closet?
>> 2. How far should a clothes rack be from the back wall?
>> 3. Does a closet rod need a center support?
>> 4. Can I install a clothes rack directly into drywall?
>> 5. How do I stop a closet rod from sagging?
>> 6. Is a double clothes rack better than a single rod?
>> 7. What should I send an OEM clothes rack manufacturer?
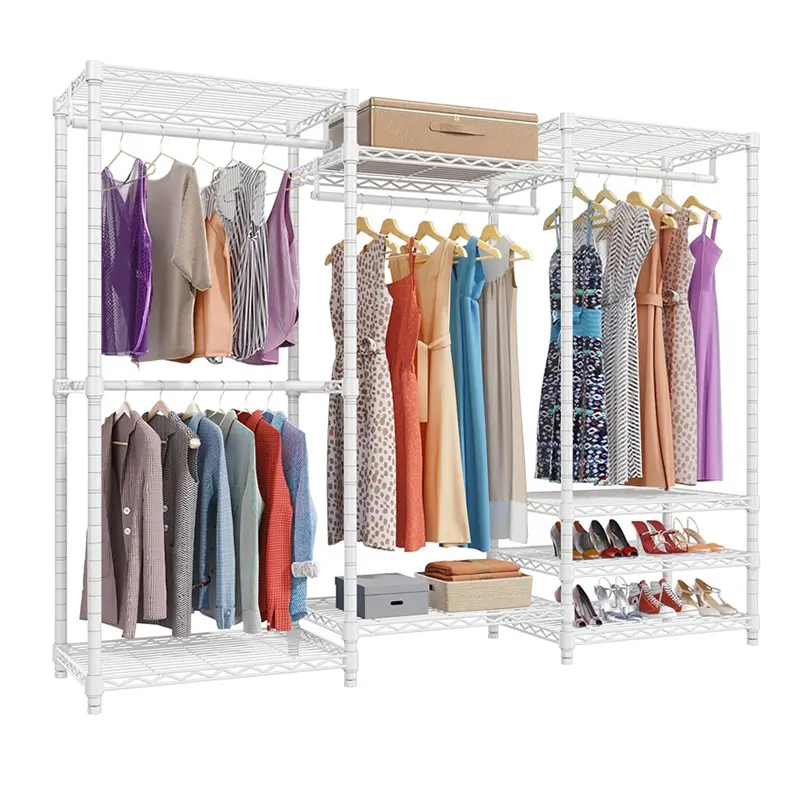
At Waigaoqiao, we have manufactured metal wire racks, garment racks, display fixtures, hooks, and brackets for global brands, wholesalers, and manufacturers since 2003. This practical guide explains how to install clothes rack in closet spaces safely, accurately, and professionally—whether you are fitting a single hanging rod, a double-rod system, or a wall-mounted metal clothes rack.
A properly installed closet clothes rack does more than create hanging space. It protects garments, reduces clutter, prevents rod sagging, and improves the long-term performance of the storage system. The most important principle is simple: measure the space, anchor into a solid structure, and match the rack capacity to the clothing load.

Many closet rack failures are not caused by low-quality metal. They are caused by incorrect measurements, weak wall anchors, unsupported spans, or an installation layout that does not match the user's wardrobe.
As an OEM manufacturer of metal storage and garment display solutions, Waigaoqiao sees the same installation issues repeatedly:
- Rods mounted too close to the back wall, leaving no clearance for hangers
- Brackets fastened only into drywall rather than wall studs
- Long metal rods installed without center support
- Double hanging systems placed too close together
- Lightweight hardware used for heavy coats, uniforms, or dense clothing collections
- Shelves installed at a height that blocks access to the hanging rod
A clothes rack should be treated as a load-bearing storage component, not simply a decorative closet accessory. A well-designed and correctly installed system distributes garment weight through brackets, screws, wall studs, and rack supports.
For most reach-in closets, a depth of approximately 24 inches provides enough clearance for standard clothes hangers. A closet as shallow as 20–22 inches may still work, but may require slimmer hangers or a more carefully planned layout.
Before learning how to install clothes rack in closet areas, gather all tools and hardware. Preparing first helps prevent inaccurate drilling and unnecessary wall damage.
- Tape measure
- Pencil or marking tool
- Spirit level or laser level
- Stud finder
- Drill and drill bits
- Screwdriver or drill driver
- Safety glasses
- Hacksaw or metal-cutting tool, if the rod needs trimming
- File or sandpaper to smooth a cut metal edge
- Metal closet rod or wall-mounted clothes rack
- End brackets or rod sockets
- Center support bracket for long spans
- Heavy-duty screws
- Wall anchors rated for the correct wall material, if studs are unavailable
- Shelf-and-rod brackets, if adding a shelf above the rack
- End caps for exposed rod ends
Professional recommendation: Whenever possible, install brackets into wood studs or solid structural blocking. Drywall anchors can be useful for light-duty systems, but they are not the first choice for a heavily loaded clothes rack.
The best way to avoid mistakes is to measure the closet at the exact location where you will install the rack. Walls are often not perfectly square, especially in older properties.
Measure:
1. Closet width from side wall to side wall
2. Closet depth from the back wall to the front edge
3. Available height from floor to ceiling
4. Stud locations where brackets can be mounted
5. Length of the garments you intend to hang
6. Shelf position, if the rack will sit below a shelf
Do not measure only once. Measure the width at both the front and back of the closet, then use the smaller measurement when cutting a fixed-length rod.
| Closet feature | Recommended starting point | Installation purpose |
|---|---|---|
| Closet depth | About 24 in. / 61 cm | Provides hanger clearance |
| Rod center from back wall | About 12 in. | Helps garments hang without rubbing the wall |
| Single hanging rod height | 60–66 in. from floor | Suitable for shirts, jackets, trousers, and many dresses |
| Upper double rod height | 70–84 in. from floor | Creates top-level hanging storage |
| Lower double rod height | 40–42 in. from floor | Suitable for folded trousers, skirts, shirts, and blouses |
| Center support requirement | Long spans, especially over 48 in. | Reduces bending and sagging |
A commonly used layout places a single clothes rod approximately 60–66 inches from the floor. For double hanging, an upper rod around 70–84 inches and lower rod around 40–42 inches creates efficient space for shorter garments.
For a standard hanger, the rod center is commonly positioned near 12 inches from the back wall. This clearance gives garments room to hang naturally while maintaining access at the closet opening.
Before drilling any holes, choose the layout based on the actual clothing you own—not only the closet dimensions.
A single clothes rack is ideal for:
- Long dresses
- Coats
- Formal wear
- Suits
- Long garments
- Small closets with limited vertical height
Install the rod around 60–66 inches from the floor, then adjust according to the longest garment. If dresses or coats nearly touch the floor, raise the rod. If shorter garments dominate the wardrobe, a double-rod layout may provide more usable storage.
A double closet rack system is ideal for:
- Shirts and blouses
- Skirts
- Folded trousers on hangers
- Children's clothing
- Retail-style wardrobe organization
- Shared closets
The upper rod is usually placed around 80 inches from the floor, while the lower rod is positioned near 40 inches. This creates two efficient hanging zones for shorter garments. [taskrabbit]
Important: Do not use a double-rod layout if you regularly store long dresses, long coats, robes, or full-length garments in that section. Reserve a full-height section for those items.
A shelf above the clothes rack is one of the most efficient ways to use vertical closet space. It creates room for boxes, folded linens, seasonal items, bags, or accessories.
Keep enough clearance between the rod and shelf so hangers can be inserted and removed easily. A minimum of roughly 4 inches between the rod and the underside of a shelf is a practical starting point, although specific hanger styles and rod diameters may require more space. [jenahalldesigns]
Decide whether you are installing a single rod, double rod, or shelf-and-rod combination. Mark the rod centerline on both side walls.
Use a tape measure from the floor and make a small pencil mark at the desired height. For a single clothes rack, start around 66 inches. For a double rack, begin with approximately 80 inches for the upper rod and 40 inches for the lower rod.
Next, measure approximately 12 inches out from the back wall to locate the rod centerline.
Use a stud finder to identify studs in the side walls and back wall. Mark each stud center with a pencil.
Stud-mounted brackets offer the best performance for metal clothes racks carrying heavy apparel. This is especially important for closets used for winter coats, uniforms, denim, suits, or bulk retail stock.
If a stud is not available at the required bracket position:
- Use a mounting board secured across multiple studs
- Use hardware specifically rated for the wall type and expected load
- Add structural blocking during renovation
- Reduce the supported load if only light-duty anchors are possible
Never assume that a drywall anchor offers the same performance as a screw driven into solid wood framing.
Hold the first rod socket or bracket against the wall. Align it with your height and depth marks. Use a level to ensure that the bracket is straight, then mark the screw-hole locations.
Repeat on the opposite side wall. Before drilling, use the level again across both marks. Even a small height difference can cause the metal rod to slope, which makes hangers slide toward one end and puts uneven stress on the brackets.
Drill pilot holes into studs before driving screws. Pilot holes make installation easier and reduce the risk of splitting wood.
If mounting into masonry, use the appropriate masonry bit and anchors. If mounting into drywall, verify that the anchor type, screw size, and rated load are suitable for the installation.
Secure the first end bracket with screws. Then install the bracket on the opposite wall.
Do not fully tighten the screws until you verify alignment. Once both brackets are installed, hold the rod in place and confirm:
- The rod is level
- The rod sits securely in both brackets
- The rod has enough front-to-back clearance
- Hangers can turn and slide freely
- The rod is not rubbing against a shelf or closet door
Long rods need extra support. A center support is particularly important when the span exceeds 48 inches or when the rack will hold heavy garments. One installation guide specifies a center support for spans longer than 48 inches and notes a maximum allowable load of 45 pounds per foot for that particular rod system. Always follow the capacity and spacing instructions for your specific hardware. [cooperlighting]
Place the center support halfway between the two end brackets. If the rack will hold unusually heavy clothing, add support based on the manufacturer's specifications and the rack design.
A strong metal rod can still sag if its support spacing is wrong. The brackets and their attachment to the wall are part of the total load-bearing system.
Measure the inside distance between the installed brackets. Cut the rod slightly shorter than this opening so it can be installed without forcing it into position.
Use a hacksaw or metal-cutting tool for steel or aluminum rods. Smooth the cut end with a file, then fit end caps where applicable.
Place the rod into the brackets and ensure it is fully seated. If your system includes locking screws, clips, or retaining brackets, install them now.
Do not immediately hang an entire wardrobe on the new rack. Start with a controlled load test.
1. Hang a few heavy garments near the center.
2. Check for movement in brackets or screws.
3. Look along the rod for deflection or sagging.
4. Confirm that brackets remain level.
5. Add clothing gradually.
If the rod bends, the brackets move, or the wall surface cracks, remove the load and reinforce the system before use.
Not all closets carry the same load. A rack used for lightweight shirts needs different support from a rack holding heavy winter coats, workwear, denim, or commercial uniforms.
Consider these questions before selecting hardware:
- Will the rack hold heavy outerwear?
- Is the closet used by one person or several people?
- Are you installing a 48-inch rod or an 8-foot rod?
- Are garments spaced loosely or packed tightly?
- Will bags, storage bins, or shoe organizers hang from the rod?
- Is the system residential, retail, hospitality, or commercial?
For heavy-duty applications, use a metal clothes rack designed for the intended load, mount it into solid structure, and install enough support points. General recommendations often suggest adding brackets at intervals of roughly 30–36 inches for better stability, particularly on longer spans.
At Waigaoqiao, we recommend that OEM buyers and project teams define the intended use before finalizing a rack specification. Rod diameter, wall thickness, surface finish, bracket design, screw type, packaging method, and load requirements should be considered as one complete system.
Drywall alone is not a reliable mounting surface for a heavily loaded closet clothes rack. Use studs, blocking, or appropriately engineered anchors.
A rod may look stable when empty but sag after clothing is added. Install center support before the problem appears.
A rod that is too low causes long garments to drag. A rod that is too high reduces accessibility. Measure the garments you own and adjust standard dimensions to fit the user.
A rack placed too close to the back wall makes garments wrinkle and prevents hangers from moving smoothly. Start near 12 inches from the back wall to the rod centerline, then verify with your actual hanger type.
A combined shelf-and-rod bracket may support two different loads at once: the shelf above and the garments below. Consider the total weight, not only the clothing load.
Waigaoqiao puts the needs of brand owners, wholesalers, retailers, and manufacturers first. Since 2003, we have focused on producing custom wire shelving, garment racks, display hooks, brackets, and metal display solutions for OEM and ODM projects. [shelves-racks]
For a successful clothes rack program, buyers need more than a generic rod. They need a supplier that understands product performance, installation conditions, packaging, finish consistency, retail presentation, and repeatable production quality.
- Custom rack dimensions and structural designs
- Metal wire racks and garment display racks
- Closet rods, hooks, brackets, and shelving components
- Powder-coated, chrome-plated, or customized surface finishes
- Retail-ready or flat-pack product configurations
- Customized branding, packaging, and labeling
- Bulk manufacturing for wholesalers, brands, and projects
- Product development support based on target load, space, and market requirements
Need a dependable metal clothes rack or custom closet storage system? Contact Waigaoqiao with your drawings, target dimensions, expected load, finish requirements, and packaging needs. Our team can help turn your concept into a production-ready OEM rack solution.
For a single hanging rod, install the rod center approximately 60–66 inches from the floor. For double hanging, place the upper rod around 70–84 inches and the lower rod near 40–42 inches. Adjust these measurements based on garment length and the height of the user.
A practical starting point is approximately 12 inches from the back wall to the center of the rod. This usually provides enough space for standard clothes hangers and garments.
Yes, long closet rods should have center support. For one rod system, center support is required for spans longer than 48 inches. Heavier garments may require additional support even on shorter spans.
You can install a light-duty rack using properly rated drywall anchors, but screws driven into wall studs are much safer for a loaded clothes rack. For coats, dense wardrobes, commercial use, or long spans, mount into studs or structural blocking whenever possible.
Use a rod with adequate diameter and wall thickness, secure end brackets into studs, add center supports on long spans, and avoid exceeding the system's rated capacity. Also test the rack gradually before fully loading it.
A double rack is better for shirts, blouses, skirts, and folded trousers because it creates two hanging levels. A single rod is better for dresses, coats, and other long garments. Many well-organized closets use both layouts in separate zones.
Send the closet or rack dimensions, expected load, material preference, preferred finish, installation type, product drawings or reference images, packaging requirements, order quantity, and target market. These details help the manufacturer recommend the correct structure and production method.
1. [Cooper Lighting Solutions, Closet Rod Install Instructions]
2. [Wayfair, Reach-In Closet Dimensions: A Comprehensive Guide]
3. [Dimensions.com, Closet Depths Dimensions & Drawings]
4. [Taskrabbit, Here's the Right Shelf and Closet Rod Height]
5. [Waigaoqiao Racks, OEM Wire Shelves, Wire Racks and Garment Racks]
6. [The Aranger, Closet Hanging Rod Guide: Choose the Right System and Installation]
7. [Jena Hall Designs, Guidelines for Making Closet Space Count]
8. [DIY Stack Exchange, Standard Distance for a Closet Rod from the Back Wall]
Hot Tags: China, Global, OEM, private label, manufacturers, factory, suppliers, manufacturing company


