
Views: 267 Author: Waigaoqiao Co.,Ltd Publish Time: 2026-10-20 Origin: Waigaoqiao Co.,Ltd
Content Menu
● How to Make a Hanging Rack for Clothes: Choose the Right Design
● Plan the Dimensions Around Your Clothing
>> Measure garments, not just the empty wall
>> Treat sample dimensions as planning examples
● Gather the Materials and Tools
● Build Your DIY Hanging Clothes Rack in Seven Steps
>> 1. Confirm the mounting surface
>> 2. Check for concealed services
>> 3. Prepare the metal surfaces
>> 4. Assemble the complete frame
>> 5. Mark the actual fixing positions
>> 6. Install the fixings correctly
● Understand Load Capacity Before Adding More Clothes
● Prevent Common Problems Before They Start
>> Clothes rub against the wall
>> The rail looks level but twists during use
>> Dark marks appear on fabrics
>> The installation starts loosening
● Wall-Mounted or Ceiling-Suspended: Know the Difference
● From DIY Prototype to OEM Garment Rack
>> What is the easiest way to make a hanging rack for clothes?
>> Can I install a clothes rack without drilling?
>> How far should a hanging rail sit from the wall?
>> How much weight can a DIY clothes rack hold?
>> Should I choose wood or metal?
>> Can Waigaoqiao manufacture custom garment racks?
● Turn Your Rack Idea into a Clear Manufacturing Brief
At Waigaoqiao, we manufacture metal wire shelving and garment display racks, providing OEM services for overseas brands, wholesalers, and manufacturers since 2003. If you are researching how to make a hanging rack for clothes, start with three decisions: where it will attach, what garments it will hold, and how much space those garments need.
For a straightforward DIY project, a wall-mounted rail made from compatible metal pipe and fittings is a useful starting point. Plan the dimensions, assemble the frame, secure it to suitable structural support, and inspect the installation before adding clothing.
This guide explains that process while highlighting the details that matter when a home project becomes a commercial fixture.
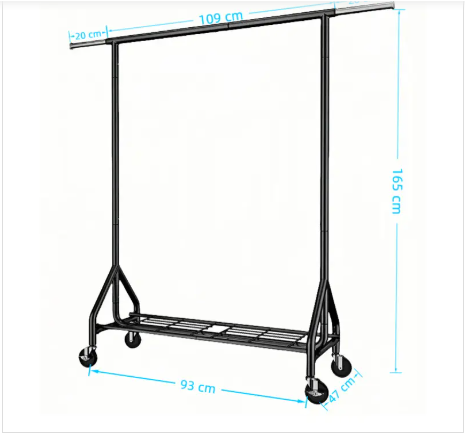
"Hanging rack" can describe a wall-mounted rail, a ceiling-suspended clothes rack, or a freestanding frame. These designs create different installation challenges.
| Rack design | Suitable application | Main consideration |
|---|---|---|
| Wall-mounted rail | Bedrooms, closets, retail walls | Wall construction and fixing strength |
| Ceiling-suspended rail | Open interiors with verified overhead support | Structural attachment and movement |
| Freestanding rack | Rentals, temporary displays, movable storage | Stability and floor space |
| Shelf-and-rail combination | Clothing with folded accessories | Combined shelf and garment loading |
For this tutorial, we focus on a wall-mounted metal clothes rack. It offers a clear assembly sequence without requiring overhead suspension.
My starting recommendation is to choose the installation method before choosing the finish. An attractive rail is not useful if the building cannot support its intended application.
Start with the longest garment you expect to hang. Measure from the hanger hook to the hem, then allow clearance beneath it.
Next, hold a loaded hanger at the proposed rail position. Check whether sleeves and shoulders touch the wall.
Record:
- Available wall width.
- Required rail height.
- Distance from the wall to the rail centerline.
- Clearance around doors, switches, and furniture.
- Space for standing and removing garments.
Use your actual hangers. A rack that suits slim shirt hangers may not suit wide coat hangers.
For an initial sketch, you might consider a rail approximately 900 mm wide, projecting around 300 mm from the wall. These are illustrative dimensions, not an engineered design or a load-rated specification.
Adjust the layout to your garments, wall structure, and chosen hardware.
Also distinguish pipe length from finished rack width. Fittings add length, while threaded engagement changes the assembled dimensions. Confirm the completed assembly before marking mounting holes.
A basic wall-mounted pipe clothes rack uses a horizontal rail connected to two projecting arms.
- One metal pipe for the horizontal hanging rail.
- Two matching pipes for the projecting arms.
- Two compatible 90-degree elbows.
- Two mounting flanges intended for the selected system.
- Substrate-appropriate structural fasteners.
- A structurally suitable backing board, if required.
- A compatible protective finish for unfinished metal.
All pipes and fittings must belong to a compatible system. Do not assume components from different suppliers will fit securely because their nominal sizes appear similar.
A backing board can help position attachments across structural members, but it does not make an unsuitable wall installation safe by itself.
Prepare a tape measure, pencil, level, suitable detector, drill, correct drill bits, appropriate wrenches, eye protection, and a stable working platform.
Have another adult assist with positioning the assembled rack. Holding a metal frame while marking accurate fixing locations is awkward alone.
Identify whether the wall is timber-framed, masonry, concrete, or another construction.
For timber-framed walls, plan attachment to suitable studs or structural blocking. Masonry and concrete require fixings selected for the actual substrate.
Do not select anchors by package load figures alone. A projecting clothes rail applies leverage, and the installed system may behave differently from the test conditions behind an anchor rating.
If the wall construction or fixing suitability is uncertain, consult a qualified installer.
Before drilling, assess the area for electrical wiring, plumbing, and other concealed services. Use suitable detection methods and consider what lies on the opposite side of the wall.
Stop if the proposed fixing points conflict with services or if the substrate cannot be identified confidently.
Inspect pipes and fittings for sharp edges, damaged threads, loose coatings, and contamination.
Some unfinished pipe products arrive with protective oil. Follow the supplier's cleaning and finishing instructions before placing garments nearby.
Let coatings cure fully. A surface can feel dry before it is ready for contact with clothing.
Connect the horizontal rail, elbows, projecting arms, and mounting flanges according to the component manufacturer's instructions.
Dry-fit the assembly first. Check that both mounting faces sit in the same plane and that the rail remains level.
Use the specified tightening method. Do not rely on decorative adhesive to compensate for incompatible or inadequately secured connections.
Hold the assembled rack against the wall with assistance.
Check the height, level, wall projection, and garment clearance again. Mark the flange holes from the actual assembly rather than calculating their positions from nominal pipe lengths.
Where a backing board is required, establish its structural attachment separately.
Use the drill size, pilot-hole requirements, fastener type, and installation depth specified for the chosen fixing and substrate.
Do not apply one drilling instruction to every wall material. Timber screws, concrete anchors, and hollow-wall fixings have different requirements.
Secure the assembly without crushing the wall surface or distorting the mounting plates.
Check for movement, loose joints, visible gaps, damaged surfaces, and misalignment.
Add garments gradually within the verified limits of the complete installation. Stop using the rack if you notice slipping, rotation, cracking, or increasing deflection.
A successful initial loading check is not a certified capacity test. Never use the rack for climbing, exercise, or supporting a person.
*Video suggestion: Show frame assembly, structural fixing selection, level checks, and final inspection in a short installation video.*
The most important word in rack planning is system. A strong rail does not guarantee a strong installation.
Performance depends on several connected elements:
- Rail material, diameter, wall thickness, and span.
- Fitting design and connection security.
- Bracket or flange geometry.
- Fastener selection and installation.
- Wall or ceiling structure.
- Load distribution and everyday handling.
Moving the rail farther from the wall increases the leverage on its attachments. Increasing the unsupported span can also increase deflection.
That is why this guide does not assign a universal kilogram capacity to a DIY pipe rack.
For commercial purchasing, request load information that identifies the tested configuration, mounting assumptions, load distribution, and acceptance criteria. A capacity statement without those conditions is difficult to apply responsibly.
Test a loaded hanger before drilling. Include bulky garments rather than checking only an empty hanger.
Check fitting compatibility, tightening instructions, and whether the mounting faces align correctly. Repeated rotation requires investigation, not simply another coat of paint.
Inspect for residual oil, corrosion, uncured coatings, and worn finishes. Remove garments until the cause is resolved.
Unload the rack. Identify whether the movement originates at the rail connection, mounting plate, fastener, or wall.
Tightening a screw repeatedly is not a solution if the surrounding substrate is deteriorating.
These troubleshooting checks also help buyers write better product requirements: specify garment clearance, finish expectations, connection security, and installation conditions before ordering.
A ceiling hanging clothes rack may create a clean visual effect, but overhead installation requires separate planning.
Do not attach a loaded rail to a suspended ceiling grid or decorative ceiling panel. The attachment must suit the actual supporting structure and loading conditions.
Also consider movement. A suspended rail can swing when garments are pulled from one end. Chains, cables, connectors, and attachment points must function as a compatible assembly.
For a first project, choose a wall-mounted design where suitable support can be verified, or purchase a purpose-designed freestanding rack. Ceiling suspension should not be treated as the same tutorial turned upside down.
A handmade prototype can reveal whether the dimensions work. It cannot establish whether hundreds of production units will perform consistently.
At Waigaoqiao, our OEM focus provides the commercial context for that next conversation: translating a rack concept into a clearly defined manufacturing brief.
Before requesting a quotation, prepare:
| Specification | Information to provide |
|---|---|
| Application | Home storage, showroom, retail, or stockroom |
| Dimensions | Finished width, height, projection, and tolerances |
| Loading | Intended garments and proposed loading conditions |
| Construction | Rail arrangement, connections, and mounting approach |
| Finish | Appearance, fabric-contact expectations, and environment |
| Packaging | Carton requirements, hardware organization, and instructions |
Ask potential suppliers how the proposed design will be sampled, inspected, and evaluated. Confirm which customization options and tests are actually available rather than assuming them.
A useful sample review includes assembly, garment access, surface condition, packaging protection, and clarity of instructions—not appearance alone.
*Visual suggestion: Place a prototype-to-production diagram here, showing drawing, sample, evaluation, revision, and approved specification.*
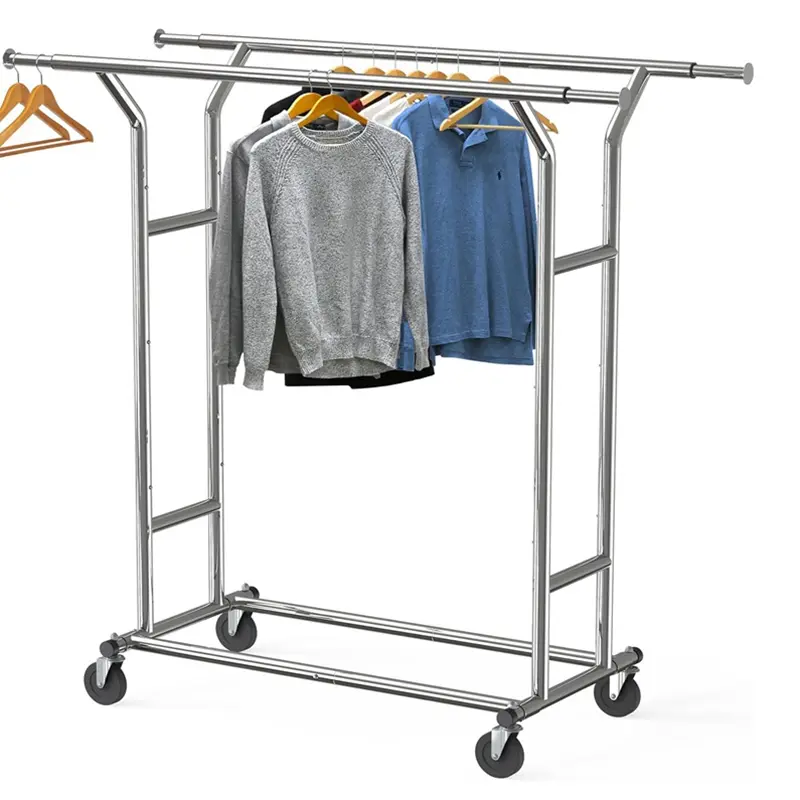
A compatible wall-mounted rail kit is often simpler than combining unrelated components. Confirm the wall structure first, then follow the kit's assembly and installation instructions.
A purpose-designed freestanding rack avoids wall drilling. Adhesive hooks and improvised tension arrangements should not be treated as equivalent substitutes for a structurally attached garment rail.
Determine the projection using your actual hangers and largest garments. Allow enough room to prevent rubbing while recognizing that greater projection increases leverage on wall attachments.
There is no universal answer. Capacity depends on the complete assembly and mounting conditions. Do not infer a safe working load from pipe diameter or one fastener's advertised rating.
Either can work in a properly designed rack. Compare span, connection details, finish, maintenance, and appearance. Material choice alone does not establish capacity.
Waigaoqiao provides OEM services for garment display racks and metal wire shelving. Send your drawing, intended application, quantity, and performance requirements so the proposed specification and available options can be discussed.
Learning how to make a hanging rack for clothes starts with dimensions and assembly. Creating a repeatable commercial product adds material specifications, installation requirements, surface expectations, and documented evaluation.
Contact Waigaoqiao with your sketch, target dimensions, intended garment load, order quantity, and destination market. Request an OEM discussion covering design feasibility, sample development, packaging, and the information needed to evaluate the finished rack.
Hot Tags: China, Global, OEM, private label, manufacturers, factory, suppliers, manufacturing company


