
Views: 238 Author: Waigaoqiao Co.,Ltd Publish Time: 2026-10-10 Origin: Waigaoqiao Co.,Ltd
Content Menu
● How to Make a Hanging Clothes Rack: Start with the Right Design
>> Decide Whether Ceiling Suspension Fits Your Space
● Plan Rail Length, Hanging Height, and Wall Clearance
>> Measure Your Clothes, Not Just Your Room
>> Let Structural Support Locations Influence Rail Length
● Choose Materials for a DIY Hanging Clothes Rack
>> Rail and Suspension Components
● Check the Load Path Before Drilling
>> Calculate the Intended Load
>> Confirm the Ceiling and Fastener Specifications
● How to Make a Hanging Clothes Rack in Seven Steps
>> Step 1: Verify the Installation Location
>> Step 2: Mark the Mounting Points
>> Step 4: Install the Ceiling Hardware
>> Step 5: Connect the Chains and Rail
>> Step 7: Introduce the Intended Clothing Load
● Prevent Sagging, Swaying, and Clothing Damage
● When Waigaoqiao OEM Manufacturing Makes More Sense
>> Can I hang a clothes rack from drywall alone?
>> How much weight can a DIY hanging clothes rack hold?
>> Can I make a hanging clothes rack without drilling?
>> Is metal better than wood for a hanging rail?
>> How do I stop a suspended clothes rack from swinging?
>> Can Waigaoqiao manufacture a custom hanging rack?
Waigaoqiao has manufactured wire shelving and garment racks since 2003, serving overseas brands, wholesalers, and manufacturers through OEM services. If you are researching how to make a hanging clothes rack, start with the complete system: the rail, suspension hardware, ceiling structure, and clothing load. A good-looking rail is only useful when these elements work together.
This guide explains how to plan a ceiling-hung garment rail, choose compatible components, assemble it, and maintain it. It also shows when a custom manufactured solution makes more sense than a one-off DIY project. The installation approach assumes verified solid timber framing; other ceiling types require a suitable professional specification.
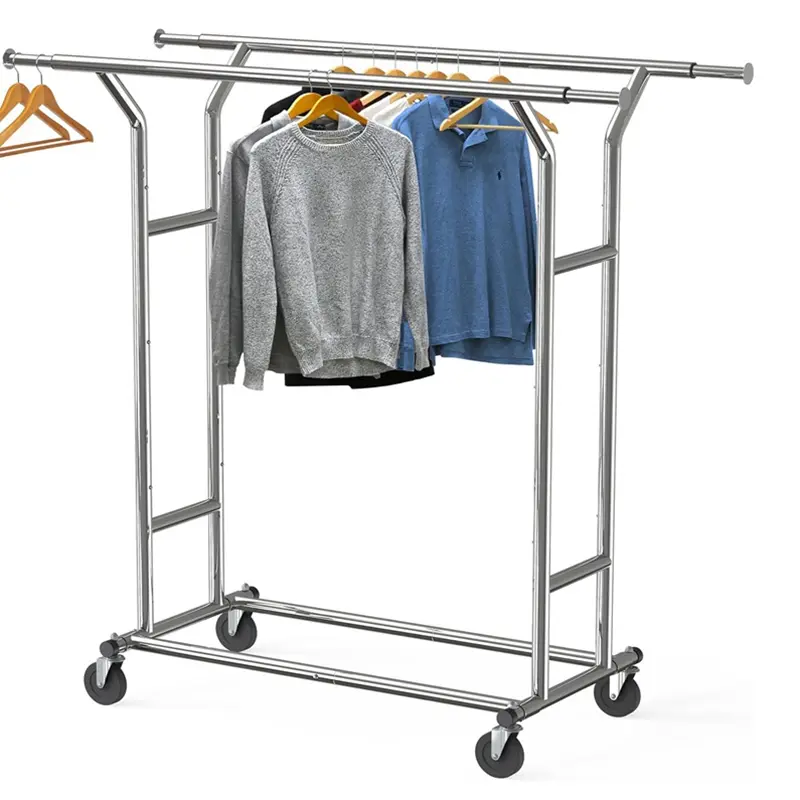
A hanging clothes rack suspends a garment rail from above, leaving the floor beneath it clear. Unlike a freestanding rack, it transfers weight into the building through its mounting points.
For this project, use a metal rail suspended by two vertical chains and purpose-designed rail attachments. Choose closed connections rather than improvised open hooks. Every component must be suitable for the actual installation and intended load.
From a manufacturing perspective, I would assess the connections before choosing a decorative finish. A polished tube cannot compensate for an unsuitable ceiling fixing or a connector that slips around the rail.
| Situation | Practical choice | Main consideration |
|---|---|---|
| Small bedroom with verified structural supports | Ceiling-hung rail | Reach, clearance, and secure mounting |
| Rental property without drilling permission | Freestanding garment rack | Landlord approval and reversibility |
| Boutique requiring repeated installations | Specified commercial rack system | Consistent components and installation documentation |
| Unknown or concealed ceiling structure | Professional assessment first | Do not select anchors by appearance |
A suspended rail is not automatically the best answer. Choose it because the installation conditions support it, not simply because it looks minimal.
Use your actual hangers and longest garments to establish the layout.
1. Measure the widest hanger you intend to use.
2. Position its center far enough from the wall for the garment to hang without rubbing.
3. Measure your longest garment from hanger hook to hem.
4. Choose a rail height that provides floor clearance and comfortable access.
5. Check doors, windows, lighting, and walking routes.
As an illustrative calculation, a hanger measuring 44 centimeters across needs more than 22 centimeters between its center and the wall. Add clearance for garment bulk and movement. This is a planning example, not a universal installation dimension.
Avoid placing the rail above beds, seating, or busy passageways. Keep it away from heaters and do not obstruct ventilation, emergency routes, or building safety equipment.
Do not assume ceiling framing follows a particular spacing. Locate and verify the actual supports before finalizing the design.
If the mounting positions do not match your preferred layout, ask a qualified installer about properly designed blocking or another mounting arrangement. Do not compensate by adding unverified drywall anchors.
| Component | What to specify | What to avoid |
|---|---|---|
| Metal garment rail | Suitable span, section, finish, and attachment compatibility | Choosing by diameter alone |
| Two suspension chains | Documented suitability and working-load limits | Decorative chain without load information |
| Closed connectors | Compatible size, locking method, and load suitability | Unrated clips or loosely closed links |
| Rail attachments | Purpose-designed fittings that resist slipping | Loose chain loops around a smooth tube |
| Ceiling fittings and fasteners | Approved combination for the verified substrate | Generic screws chosen only by length |
| Rail end caps | Secure, smooth protection for exposed ends | Sharp or unfinished tube edges |
Steel tube is worth considering when you want a metal garment rail, but strength depends on tube section, wall thickness, unsupported span, and material properties. Wood can suit a softer interior aesthetic, although its suitability depends on species, section, defects, and connection design.
Decorative copper tutorials can provide visual inspiration. Do not assume that a plumbing assembly or glued connection has a verified overhead storage capacity.
Prepare a tape measure, pencil, level, framing detector, suitable drill and bits, specified fasteners, assembly tools, eye protection, and a stable work platform. Arrange a helper for positioning the rail.
Ask the supplier to cut and deburr the rail if you lack suitable equipment. Clean any processing residue and confirm that the finish will not mark clothing before installation.
The load path runs from clothing to rail, from rail to connectors and chains, and finally through the ceiling fixings into structural framing. Each link matters.
Weigh representative garments rather than relying on an assumed weight per hanger. Include the rail, chains, fittings, and any other items the rack will support.
For example, 20 garments averaging 0.6 kilograms contribute 12 kilograms. If the suspended assembly weighs another 3 kilograms, the total static load is 15 kilograms. These numbers illustrate the method; they do not establish a safe capacity for your design.
Do not divide that total by two and conclude that two matching fittings are sufficient. Uneven loading, connection geometry, and movement can change the forces at individual supports.
For this guide's installation method, attach to verified solid timber framing with the specified hardware. Drywall itself is not the structural support.
Concrete, engineered joists, trusses, and suspended ceilings need different assessments. Do not drill or alter engineered structural members without the required approval. A wall-anchor rating also does not automatically apply to overhead tension loading.
If you cannot identify the structure, fastener requirements, or allowable installation load, stop and obtain professional advice. A successful short trial does not establish long-term structural safety.
Confirm ownership or landlord permission where relevant. Identify structural supports and assess concealed wiring or pipework before drilling. Treat framing-detector readings as a starting point, not proof that every drilling location is safe.
Mark the verified support centers and check the planned rail position against garment clearance. Keep the suspension arrangement consistent with the component supplier's instructions.
Cut it to the specified length, remove burrs, clean the surface, and fit secure end caps. Install the purpose-designed suspension attachments according to their instructions. Do not improvise attachment holes or modify fittings without confirming suitability.
Follow the fastener manufacturer's requirements for pilot holes, embedment, spacing, and tightening. There is no single screw length or drill-bit size that is correct for every ceiling and fitting.
Use suitable structural fasteners, not drywall screws. If the substrate differs from the original plan, reassess rather than switching anchors on the spot.
Have a helper support the rail while you connect the suspension hardware. Close and secure every connector as specified. Ensure that attachments cannot slide off the ends or release when the rail moves.
Adjust the suspension lengths until the rail is level. Inspect all connections and verify that the rail does not contact nearby surfaces. Do not climb on the rack, pull yourself upward, or hang body weight from it.
After the installation has been checked against its specifications, add clothing gradually and distribute it across the rail. Watch for unexpected deflection, slipping, movement, or cracking around the fixings.
Unload immediately if anything changes. This functional check is not a substitute for engineering verification or a rated system.
A rail that bends visibly may have an unsuitable section, excessive unsupported span, or an uneven load. Do not solve the problem by adding another ceiling connection without verifying its support and the revised design.
Chain suspension can allow movement. If stability is essential for a retail display, consider a properly specified rigid system rather than adding improvised wall ties.
Inspect the rack periodically and after any unusual movement or load change. Look for loose connections, coating damage, corrosion, and movement at mounting points. Follow the supplier's maintenance instructions and remove the rack from service if its condition is uncertain.
Wet laundry requires separate consideration because it adds weight and moisture exposure. Do not repurpose a dry-garment rail as a laundry airer without checking that use.
DIY can suit one carefully planned home installation. A brand or wholesaler needs more: repeatable dimensions, consistent finishes, compatible hardware, clear assembly instructions, and controlled product specifications.
Waigaoqiao offers OEM design collaboration for wire shelving and garment racks. Its website also publishes customer testimonials emphasizing long-term supplier relationships, manufacturing service, and value. These are supplier-published accounts, not independently verified reviews or evidence of a particular rack's load capacity.
Provide the intended market, installation environment, rail dimensions, clothing type, target load, finish, packaging needs, order quantity, and drawings. State whether you want a ceiling-hung, wall-mounted, or freestanding product; do not assume an existing model supports every mounting method.
Ask for an approved sample, applicable testing information, assembly documentation, and written confirmation of the final specification. For suspended products, distinguish the product's capacity from the building installation's capacity.
Send your project brief to mail@waigaoqiao.com to discuss feasibility and request an OEM quotation. Include photographs and mounting requirements so the conversation starts with practical design information rather than appearance alone.
Not with the installation method described here. Use verified structural supports and appropriate hardware. Other arrangements require a specifically assessed system, not assumptions based on a wall-anchor package.
There is no universal answer. Capacity depends on the rail, span, connections, suspension, fixings, and supporting structure. A component rating does not establish the capacity of the complete installation.
A conventional ceiling-hung rail needs a suitable mounting arrangement. If drilling is prohibited, a freestanding rack is usually the more practical alternative. Do not use adhesive hooks for this project.
Neither material is automatically better. Compare the intended span, load, section, connections, finish, and maintenance needs. Choose a documented design rather than judging strength by appearance.
Use it gently and distribute clothing evenly. If movement is unacceptable, choose a properly designed rigid mounting system. Do not improvise restraints that introduce unverified loads.
Waigaoqiao advertises OEM collaboration for garment racks. Submit your proposed suspended design and installation requirements for feasibility review; specific dimensions, capacity, testing, and hardware need project-level confirmation.
Hot Tags: China, Global, OEM, private label, manufacturers, factory, suppliers, manufacturing company


