
Views: 246 Author: Waigaoqiao Co.,Ltd Publish Time: 2026-08-17 Origin: Waigaoqiao Co.,Ltd
Content Menu
● Why Correct Wire Shelf Installation Matters
● Tools and Materials You Need
● Step 1: Plan the Shelf Layout and Load
>> Questions to Answer Before Installation
>> Recommended Clearance Guidelines
● Step 2: Find Studs and Mark the Installation Line
>> Why Leveling Is Non-Negotiable
● Step 3: Install the Hang Track or Back-Wall Clips
>> Track-Mounted Wire Shelving
● Step 4: Mount Standards, Brackets, and Supports
>> Professional Installation Checklist
● Step 5: Fit, Trim, and Secure the Wire Shelves
● Choosing Anchors for Different Wall Types
● Load Testing and Final Safety Inspection
● Common Wire Shelf Installation Mistakes
>> Installing Into Drywall Alone for Heavy Loads
>> Overloading Open Wire Shelves
● Why Choose Waigaoqiao for Wire Shelving OEM Projects?
● FAQ
>> 1. Can I install wire shelves directly into drywall?
>> 2. How far apart should wire shelf brackets be?
>> 3. What is the best height for wire shelves in a pantry?
>> 4. Do wire shelves need to be installed into studs?
>> 5. Can wire shelves be installed on concrete walls?
>> 6. How do I stop wire shelves from sagging?
>> 7. Should I cut wire shelving before or after mounting brackets?
At Waigaoqiao, we have manufactured metal wire racks and garment display systems for international brands, wholesalers, and manufacturers since 2003. If you are asking how to install wire shelves on a wall, the key is simple: design for the load, locate solid fixing points, keep every component level, and use the correct anchors for the wall material.
A wire shelf may look lightweight, but it can carry pantry goods, folded garments, cleaning supplies, tools, or retail inventory. A poor installation can lead to sagging shelves, damaged walls, or product loss. This guide explains how to install wall-mounted wire shelves safely, efficiently, and with a professional finish.
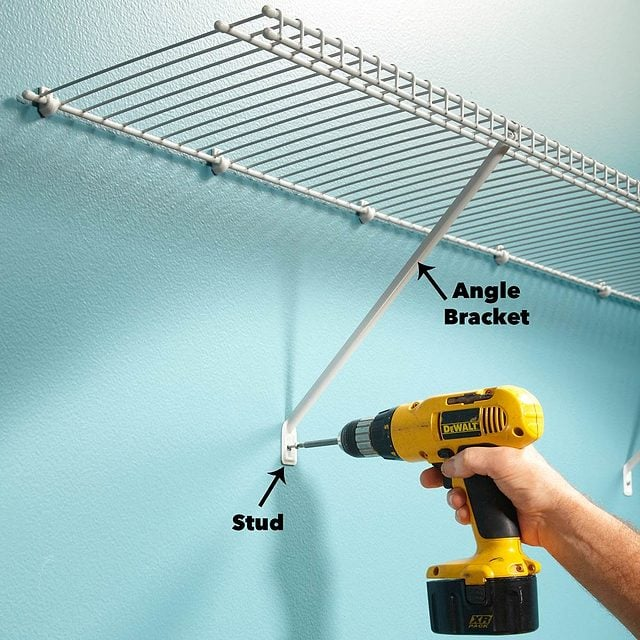
Wall-mounted wire shelving is popular because it is open, ventilated, easy to clean, and adaptable. It works well in closets, pantries, garages, laundry rooms, stockrooms, and commercial display areas.
However, the shelf itself is only one part of the storage system. Its actual performance depends on the wall, fasteners, brackets, shelf depth, support spacing, and the load placed on it.
At Waigaoqiao, we advise OEM buyers and installation teams to treat wire shelving as a complete engineered system—not as a single product installed with whatever screws happen to be available.
A successful installation should deliver:
- A level shelf surface for stable storage and a polished appearance
- Secure connections to studs, masonry, or rated anchors
- Adequate bracket and support spacing to reduce deflection
- Appropriate load planning for the intended storage application
- A corrosion-resistant finish suited to closets, kitchens, garages, or humid environments
- Safe edge protection, especially where shelving is cut to size
For track-based systems, shelf standards are commonly positioned no more than 24 inches apart, while the end of the shelf should remain close to a supporting standard. Always follow the load and spacing limits specified for the particular shelf system.
Before installing wire shelves on a wall, confirm that you have the correct components for your shelf type. Most wall-mounted systems use either a horizontal hang track with vertical standards or direct wall clips with angled support braces.
- Tape measure
- Pencil or marking pen
- Spirit level or laser level
- Stud finder
- Drill and drill bits
- Screwdriver or impact driver
- Safety glasses
- Hacksaw or bolt cutters for trimming wire shelves
- Metal file or deburring tool
- Rubber mallet
- Utility knife, if needed for drywall-anchor installation
- Wire shelves
- Hang track, if using a track-mounted system
- Vertical standards
- Shelf brackets
- Wall clips or back-wall clips
- Support braces
- End brackets
- Manufacturer-approved screws
- Drywall anchors, toggle bolts, or masonry anchors where required
- Plastic end caps for trimmed wire ends
Expert tip: Do not select anchors by appearance alone. The anchor must be rated for the wall substrate and the expected load. Drywall anchors can help where a fixing misses a stud, but they do not replace a properly designed stud-mounted or masonry-mounted installation for heavy storage. [lowes]
The first step in learning how to install wire shelves on a wall is not drilling—it is planning.
Measure the available wall width, height, and usable depth. Then decide what will be stored. A shelf for folded clothing needs different clearance and load capacity than one holding paint cans, bulk food, or retail cartons.
- What is the shelf's total width and depth?
- What will be placed on each shelf?
- What is the estimated weight per shelf?
- Is the wall drywall, plaster, concrete, brick, or block?
- Are wood or metal studs available at the required location?
- Will the shelf be cut to fit around a corner, door frame, or utility connection?
- Is the installation residential, retail, warehouse, or commercial back-of-house?
| Application | Typical Vertical Space Between Shelves | Planning Note |
|---|---|---|
| Pantry cans and dry goods | 12–16 inches | Keep frequently used items within easy reach |
| Laundry supplies | 14–18 inches | Allow room for tall detergent containers |
| Folded clothing | 12–15 inches | Use shelf liners for small accessories |
| Garage storage | 16–24 inches | Plan for bins, tools, and heavier products |
| Closet top shelf | 12–18 inches above hanging rod | Keep seasonal storage higher |
| Retail stockroom | Based on carton size | Confirm load capacity before installation |
Our professional recommendation: Place the heaviest items lower on the wall. This improves access, reduces injury risk, and lowers the force applied to the upper shelf supports.
For the strongest wire shelving installation, mount the horizontal hang track or primary brackets into wall studs whenever possible.
Use a stud finder to identify each stud location. Mark the center of every stud with a light vertical pencil line. In many framed walls, studs are commonly spaced 16 or 24 inches on center, but you should always verify rather than assume.
Next, decide the height of the top rail or first shelf. Use a spirit level or laser level to draw a horizontal reference line.
Even a small error becomes visible across a long shelf run. A shelf that slopes can cause stored goods to shift, hangers to slide, and the entire installation to look unprofessional.
For a hang-track system:
1. Hold the track along your horizontal reference line.
2. Align as many screw holes as possible with stud centers.
3. Drive one screw near the middle of the track.
4. Recheck the track with a level.
5. Install the remaining screws only after the track is confirmed level.
A properly leveled hang track creates the reference point for every standard, bracket, and shelf that follows.
Your installation method depends on the type of wire shelf system you selected.
Track systems are often the best option for adjustable closets, pantries, utility rooms, and commercial storage areas. The horizontal hang track distributes loads across several wall fasteners and allows vertical standards to be repositioned.
Install the track with screws that pass through the track and into studs. A commonly specified method uses #12 × 2-inch pan-head screws at stud locations, though you must confirm the exact hardware requirements of your own system.
Direct-mount systems generally use back-wall clips, end brackets, and diagonal support braces. These can be efficient for simple, fixed shelf runs.
For each shelf:
1. Mark the shelf height with a level line.
2. Position back-wall clips along the line.
3. Fix clips into studs where possible.
4. Install end brackets at each shelf end.
5. Add angled support braces beneath the front edge of the shelf.
For longer shelves and heavier loads, add supports more frequently. One industry installation guide recommends a shelf support brace at least every 36 inches, reducing the spacing to every 24 inches for heavier loads.
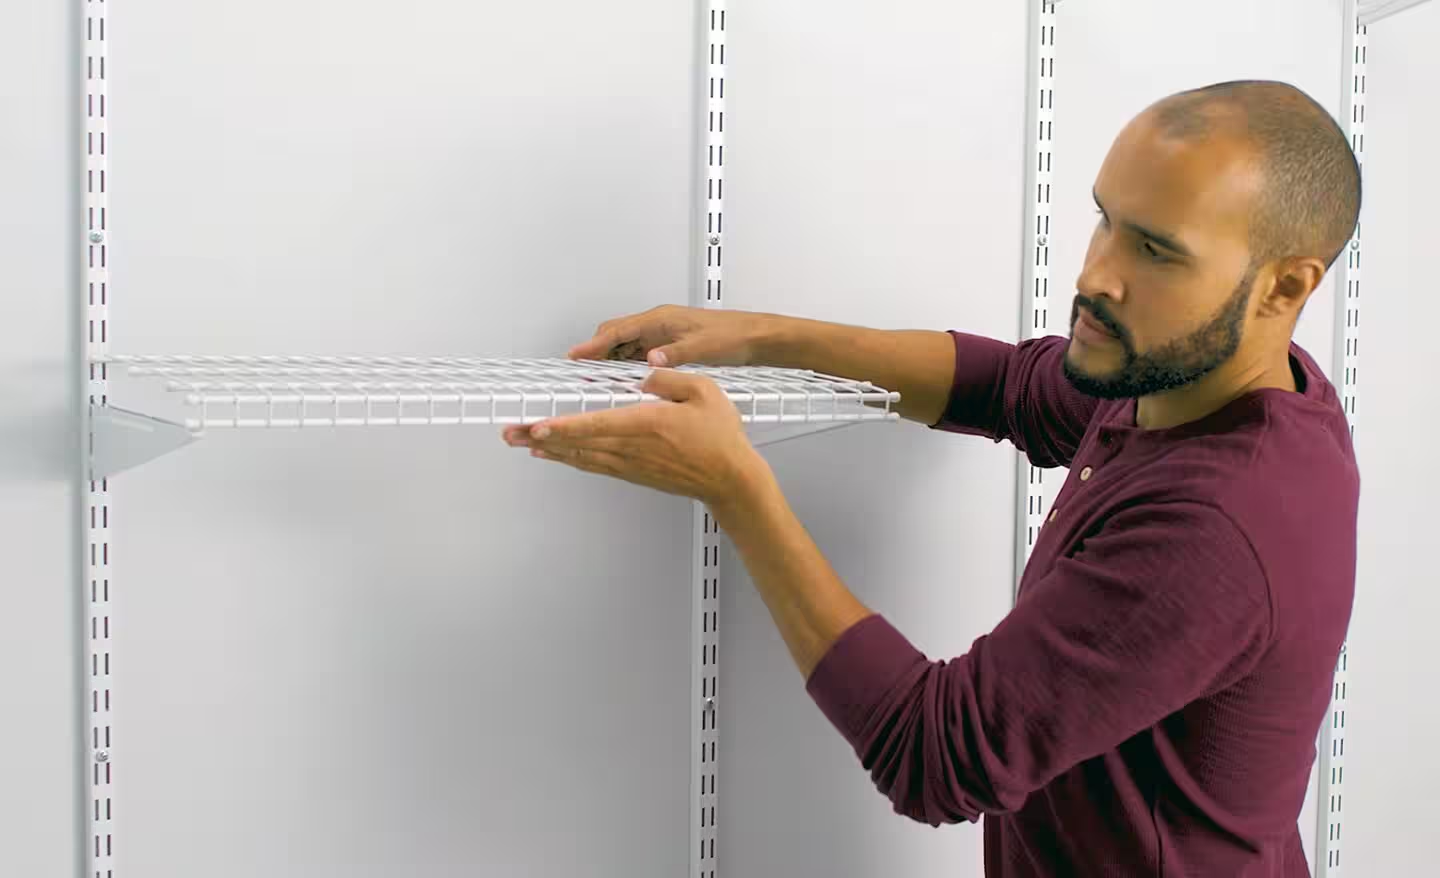
For a track system, hook each vertical standard onto the installed hang track. Confirm that every standard is vertical, also called plumb, before fastening its lower section to the wall.
Keep standards no more than 24 inches apart unless the shelf system's instructions explicitly allow a wider spacing. Position a standard close to each shelf end to prevent the shelf from flexing at the outer edges.
Then insert shelf brackets at the same height on every standard. Check alignment before placing the wire shelf onto the brackets.
- Standards are plumb
- Brackets are at the same height
- Brackets lock securely into standards
- Shelf ends are supported
- Support spacing matches the intended load
- No sharp cut-wire ends remain exposed
- All screws are tightened without stripping the wall material
In commercial installations, consistency matters as much as strength. Uneven shelf heights or visibly inconsistent bracket spacing can reduce the perceived quality of a retail display or storage area.
Measure the shelf length again before cutting. Allow suitable clearance at side walls, corners, or trim. If the system requires end caps or end brackets, account for their space before making the cut.
Use a hacksaw or bolt cutters designed for metal wire. Wear safety glasses. After cutting:
1. Remove sharp burrs with a metal file.
2. Clean away metal fragments.
3. Install plastic end caps.
4. Place the shelf into wall clips or over shelf brackets.
5. Confirm that the shelf is fully seated and secured.
Important: Never leave sharp cut ends exposed. This is especially important in family homes, closets, stores, and workplaces where users may reach above shoulder height.
A common installation failure happens when hardware is selected for the wrong wall.
| Wall Type | Preferred Fastening Approach | Important Note |
|---|---|---|
| Wood studs behind drywall | Screws into stud centers | Best option for strength |
| Drywall with no stud at fixing point | Rated toggle bolt or approved drywall anchor | Use only within the anchor's load rating |
| Metal studs | Fasteners designed for metal framing or approved toggle solutions | Confirm stud thickness and load requirements |
| Concrete or brick | Masonry anchors with a hammer drill | Do not use standard drywall anchors |
| Hollow block | Anchors rated for hollow masonry | Confirm pull-out capacity before loading |
For drywall anchors, drill the pilot hole according to the anchor manufacturer's instructions. The anchor should fit securely, and the screw should be driven fully without crushing or tearing the drywall surface. Toggle bolts and steel hollow-wall anchors typically need larger holes than plastic anchors.
At Waigaoqiao, our guidance for OEM and project customers is clear: use the shelf manufacturer's fasteners first, then upgrade only with a compatible solution approved for the wall condition and load requirement.
Do not load a newly installed wire shelf immediately with its heaviest items. First, perform a controlled inspection.
1. Check the hang track or shelf line with a level.
2. Confirm that all screws and anchors are fully seated.
3. Pull lightly on each standard, bracket, and support brace.
4. Inspect for wall movement, cracking, or loose hardware.
5. Add a light load first.
6. Increase the load gradually.
7. Recheck the shelf after 24 hours.
Watch for warning signs:
- Shelf sagging
- Brackets shifting
- Screws backing out
- Cracked drywall
- Wall clips pulling away
- Uneven shelf height
- Excessive bounce when items are placed on the shelf
If any of these signs appear, remove the load and correct the installation before use.
Drywall may hold a light accessory shelf, but it is not a reliable primary mounting point for heavy storage. Fix into studs, masonry, or properly rated anchors whenever possible.
A shelf can be firmly attached and still be poorly installed. An unlevel shelf affects appearance, usability, and load distribution.
Long runs need more than two end brackets. Add supports according to the shelf length, shelf depth, and anticipated load.
A fastening method suitable for a wood stud wall may fail in hollow masonry, metal studs, or weak plaster. Identify the wall before buying hardware.
Wire shelving is versatile, but every system has a capacity limit. Spread weight evenly and avoid concentrating heavy objects in the middle of a long shelf span.
Waigaoqiao has specialized in metal wire racks and apparel display racks since 2003. We serve overseas brand owners, wholesalers, and manufacturers with OEM-focused production capabilities.
Our approach combines manufacturing practicality with end-user experience. We understand that a wire shelf must not only look clean in a catalog or showroom—it must also install efficiently, support its intended load, resist wear, and provide reliable daily use.
For buyers developing a wire shelving line, we can support product decisions involving:
- Wire diameter and mesh configuration
- Shelf depth and length customization
- Powder-coated, chrome, or specialized surface finishes
- Brackets, wall clips, support braces, and accessory compatibility
- OEM branding and packaging
- Application-specific design for closets, retail, laundry, pantry, garage, and storage projects
CTA: Planning a wire shelving collection or sourcing a custom wall storage system? Contact Waigaoqiao to discuss your OEM requirements, target market, loading needs, finish options, packaging, and production specifications.
Yes, for light loads and only with anchors rated for the application. For heavy storage, install the main track or supports into wall studs, masonry, or another solid structural fixing point whenever possible.
It depends on the shelf system and intended load. In track systems, vertical standards are commonly spaced no more than 24 inches apart. Direct-mount support braces may be positioned around every 36 inches for normal loads and closer together for heavier loads.
A practical starting point is 12–16 inches between shelves for cans, jars, and dry goods. Increase the gap for tall containers, small appliances, or bulk products.
Stud mounting is strongly recommended because it provides the most secure attachment. Where a component cannot align with a stud, use an anchor specifically rated for the wall type and load.
Yes. Use a hammer drill, masonry-rated drill bit, and masonry anchors. Standard drywall screws and plastic drywall anchors are not suitable for concrete.
Use enough brackets or support braces, keep standards within the manufacturer's recommended spacing, mount primary supports into solid structure, and distribute stored weight evenly.
Measure and cut the shelf before final installation. This lets you verify clearance, install end caps, and ensure that the shelf properly fits between walls, end brackets, or adjacent components.
1. [The Home Depot: How to Install Wire Shelving]
2. [Rubbermaid ShelfTrack Installation Tips PDF]
3. [Lowe's: How to Install Wire Shelving]
4. [The Home Depot: How to Use a Drywall Anchor]
5. [ClosetMaid PRO Wire Shelving Specification Sheet].pdf)
6. [Organize-It: Installing Wire Shelving]
Hot Tags: China, Global, OEM, private label, manufacturers, factory, suppliers, manufacturing company


