
Views: 259 Author: Waigaoqiao Co.,Ltd Publish Time: 2026-08-10 Origin: Waigaoqiao Co.,Ltd
Content Menu
● Why Clothes Rack Use Matters
● How to Choose the Right Clothes Rack Before Use
>> Match Rack Type to the Application
>> Evaluate Weight, Dimensions, and Mobility
● How to Assemble a Clothes Rack Safely
>> Step 1: Inspect All Components
>> Step 2: Build and Level the Base
>> Step 3: Install Uprights and Crossbars
>> Step 4: Tighten, Test, and Recheck
● How to Use a Clothes Rack for Retail Display
>> Group Products in a Logical Order
>> Give Every Garment Breathing Room
>> Use Height and Direction to Create Focus
● How to Use a Clothes Rack at Home or in a Stockroom
>> Create Zones Instead of One Mixed Rail
>> Protect Garments and the Rack
● Clothes Rack Maintenance Checklist
● Why Choose Waigaoqiao for Clothes Rack OEM Projects
>> 1. How many clothes should I put on a clothes rack?
>> 2. Can I use a clothes rack for heavy winter coats?
>> 3. How do I keep a rolling clothes rack from moving?
>> 4. What is the best way to organize a retail clothes rack?
>> 5. Should clothes racks be placed near the store entrance?
>> 6. How often should I inspect a garment rack?
A clothes rack is more than a place to hang garments. When used well, it becomes a practical tool for retail merchandising, inventory organization, garment care, and brand presentation. At Waigaoqiao, we have manufactured metal wire racks and garment display fixtures for overseas brands, wholesalers, and manufacturers since 2003. From our OEM production experience, the most successful clothing racks are not simply strong—they are selected, assembled, loaded, and positioned for a specific user journey.
This guide explains how to use a clothes rack effectively in retail stores, showrooms, warehouses, homes, pop-up events, and fashion production environments. You will learn how to choose the right rack, set it up safely, organize garments for easier browsing, and maintain it for a longer service life.
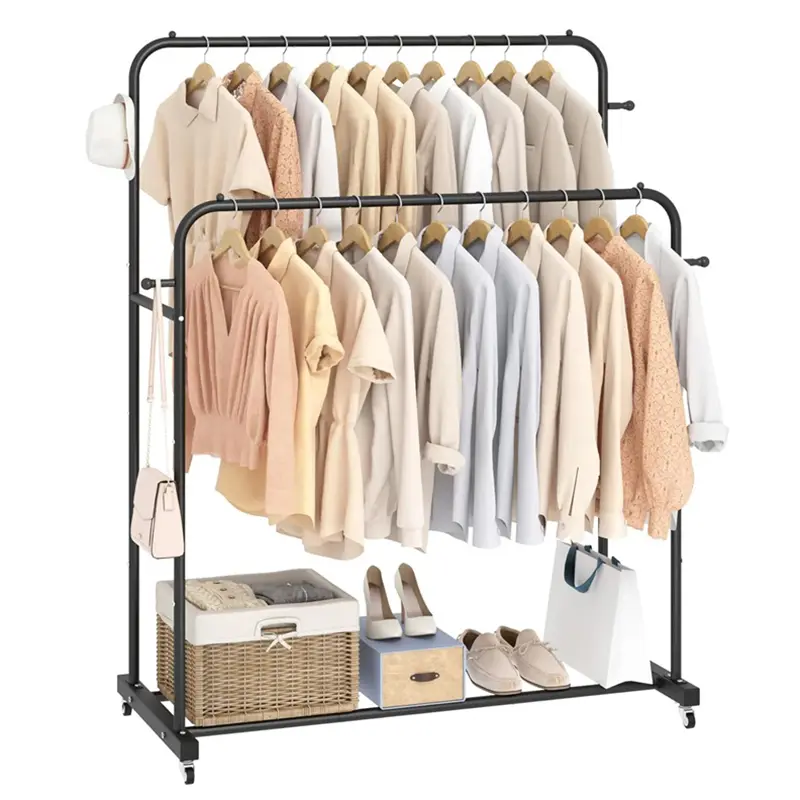
A clothes rack performs two essential jobs: it supports the physical weight of garments and helps people see, access, and evaluate those garments quickly. In a retail environment, the rack also shapes traffic flow and directs attention toward new arrivals, featured styles, or complementary accessories.
For brands and retailers, poor rack use creates common problems:
- Garments become overcrowded, wrinkled, or difficult to browse.
- Uneven loading can make a rack unstable or shorten its lifespan.
- Inconsistent hangers and spacing make merchandise look less premium.
- Poorly placed racks can block customer pathways and reduce visibility.
- A rack designed for lightweight apparel may be overloaded with heavy coats, denim, or bulk stock.
At Waigaoqiao, we recommend treating rack selection and placement as part of the overall display strategy—not as an afterthought. A high-quality metal garment rack gives users a durable structure, but correct daily use determines whether the display feels organized, safe, and commercially effective.
Before assembling or loading a clothes rack, identify its intended function. The right product depends on garment volume, item weight, available floor space, movement frequency, and the visual standard of the brand.
| Rack type | Best use | Key advantage |
|---|---|---|
| Single-rail clothes rack | Small retail displays, homes, backstage areas | Simple, accessible, space-efficient |
| Double-rail clothes rack | High-volume apparel storage | Separates short garments and increases hanging capacity |
| Rolling garment rack | Stockrooms, pop-up shops, fashion events | Easy repositioning and flexible workflow |
| Heavy-duty clothes rack | Coats, denim, bulk inventory, production facilities | Greater structural stability |
| Four-way display rack | New arrivals and featured collections | Creates a strong focal point |
| Wall-mounted clothes rack | Small stores and narrow spaces | Preserves floor area |
| Wire shelving rack with hanging rail | Mixed apparel and accessory storage | Combines hanging, folding, and display functions |
A single-rail rack is often ideal for dresses, shirts, or a small curated collection. A double-rail model can increase vertical capacity, especially for tops, skirts, children's clothing, or folded items stored beneath the rails. For long garments such as evening dresses or trench coats, allow sufficient vertical clearance so hems do not touch the floor.
Wall-mounted rails are especially useful when floor space is limited. They can keep a store more open while providing room for size runs or color variations. Face-out arms can display a key style toward the customer, while longer hang-bars can hold additional inventory.
Do not choose a rack based only on appearance. Ask the manufacturer for the product's load guidance, tube specification, welding or connection method, caster design, finish, and recommended application.
For OEM buyers, these questions should be clarified before sampling or mass production:
1. What garments will the rack carry: lightweight shirts, denim, coats, or packed inventory?
2. Will the rack remain stationary or move many times per day?
3. Does it need locking wheels?
4. Will it be used in humid conditions, a warehouse, a showroom, or a customer-facing store?
5. Is a custom width, height, color, logo plate, shelf, hook, or packaging solution required?
A clothes rack should not be treated as a one-size-fits-all commodity. The right material thickness, finish, and structural design help reduce product damage, improve safety, and align the fixture with the brand's expected service environment.
Always follow the assembly instructions supplied with the specific rack model. Connection methods vary: some racks use bolts and screws, while others use push-button tubing, clips, or tool-free locking systems.
Before assembly, place all parts on a clean and level surface. Check that you have the base bars, uprights, rails, wheels or feet, connectors, screws, washers, shelves, and instructions.
Look for bent tubing, missing hardware, damaged welds, or cracked plastic components. Do not force damaged parts into position. Resolving a problem before assembly is safer and faster than correcting an unstable rack after it is loaded.
Install the base first. If the rack includes casters, insert and lock them according to the product instructions. For racks with adjustable feet, position the rack where it will be used, then adjust each foot until the frame sits level without rocking.
A level base matters because uneven contact points can concentrate load on one side. Over time, this may loosen fasteners or cause a rolling rack to drift.
Attach the vertical posts firmly to the base, then connect the horizontal rail or crossbars. Ensure both sides are set to the same height. If the rack is adjustable, use a tape measure rather than estimating by eye.
For clip-based shelving systems, position clips at identical levels before adding a shelf. Assembly guidance for modular garment racks similarly emphasizes keeping clips aligned and using measurements to maintain consistent shelf height.
Tighten each required fastener, but avoid over-tightening threads or deforming thin metal parts. Once assembled, gently test the rack by pushing it from several directions. It should feel stable, sit squarely on the floor, and roll smoothly if it has wheels.
Before hanging merchandise, check:
- The hanging rail is fully seated.
- Wheels are properly installed and locked where required.
- Shelves do not move or sag.
- Screws and bolts are secure.
- No sharp edges can snag fabric or injure users.
The best retail clothes rack displays merchandise clearly without making it feel crowded. A customer should be able to identify the collection, touch individual garments, compare options, and return items to the rail without difficulty.
Start with one organizing principle. You may group clothing by category, size, color, fabric weight, season, gender, price point, or collection. Do not mix every system on one rack; it creates visual confusion.
For example, a boutique could use one rack for linen shirts organized from light to dark colors. A second rack could display matching trousers and a small accessory shelf. This creates a complete outfit story without overwhelming the shopper.
Retail display guidance consistently recommends category-based grouping and using accessories such as hooks or shelves to improve product discovery and encourage coordinated purchases.
Overfilling a rack is one of the fastest ways to reduce perceived quality. Customers should be able to slide hangers comfortably, see the shoulder line and fabric of each piece, and remove an item without pulling several others along with it.
Use consistent hangers whenever possible. Matching hanger shape and height makes the display look more intentional and helps garments hang evenly. Maintain a repeatable spacing standard across the rack, then adjust density based on garment thickness. Heavy knitwear, padded outerwear, and delicate items need more room than lightweight T-shirts.
A practical rule: if customers cannot browse with one hand, the rack is probably too full.
Place key merchandise at a comfortable viewing and handling height. Use full-length rails for dresses and coats, while shorter garments can work well on a double-rail rack or shelf-and-rail combination.
Feature racks should display a focused story: a new collection, a seasonal color palette, a best-selling silhouette, or a limited promotion. Four-way racks are particularly useful near entrances and high-traffic areas because they can draw attention to selected merchandise.
For wall-mounted systems, use face-out arms for one hero garment or a small color story. Use hang-bars behind or alongside them for size runs and additional stock. This keeps the display visually persuasive while remaining functional for sales staff and customers.
A clothes rack can also improve home wardrobes, styling rooms, sample rooms, and warehouse workflows. The principle is the same: store garments where they remain visible, accessible, and protected.
Divide the rack into clear zones. For example:
- Everyday clothing on the left
- Workwear in the center
- Dresses or occasionwear on the right
- Bags, shoes, or folded knitwear on a lower shelf
- Accessories on hooks or side arms
In a fashion warehouse, use labeled zones for incoming samples, quality-control items, photo-shoot looks, approved stock, and returns. This prevents garments from being lost or mixed between production stages.
Avoid placing wet clothes on a standard retail garment rack unless the rack and its finish are specifically designed for drying use. Moisture can affect garments, wheels, joints, and surface finishes over time.
Keep heavy items closer to the center of the rail rather than concentrating them at one end. Never hang bags, cartons, or excessive weight from a lightweight side arm unless the product has been designed and tested for that purpose.
Regular maintenance preserves both safety and presentation. It also helps OEM buyers and retailers identify recurring issues before they become costly replacements.
- Wipe dust, fingerprints, and surface marks from the frame.
- Remove loose threads, broken hangers, and clutter from the base.
- Check that wheels roll smoothly and brakes engage correctly.
- Confirm garments are not dragging on the floor.
- Inspect bolts, joints, welds, and rail connections.
- Look for scratches, rust, peeling coating, or bent tubes.
- Check caster housings for hair, thread, or debris.
- Rebalance merchandise if one side carries noticeably more weight.
- Refresh the product assortment and visual order.
Retail fixture guidance recommends routine inspection for wear, loose parts, scratches, and rust, along with appropriate material-safe cleaning and seasonal display updates.
For metal racks, use a soft cloth and a mild cleaner suitable for the finish. Dry the surface after cleaning, particularly around joints and connection points. Avoid abrasive pads that can damage powder coating, plating, or painted surfaces.
Waigaoqiao puts manufacturing practicality first. Since 2003, we have focused on metal wire racks and garment display solutions for international brands, wholesalers, and manufacturers seeking OEM support.
A productive OEM clothing rack project starts with clear requirements. Our team can work with buyers on rack structure, dimensions, finish direction, display functions, packaging needs, and production consistency. Whether the project requires a streamlined single rail, a mobile heavy-duty rack, a wire shelving system, or a customized retail fixture, the goal is the same: create a rack that fits the real use case.
Need a clothes rack designed for your brand, store format, or distribution program? Contact Waigaoqiao to discuss your OEM requirements, request product specifications, and begin a customized garment display solution.
The right quantity depends on garment thickness, rack capacity, and display purpose. Do not crowd the rail: every item should slide easily, remain visible, and be removable without pulling adjacent garments.
Yes, but choose a heavy-duty rack designed for the intended load. Distribute coats evenly across the rail and inspect joints, wheels, and base stability regularly.
Use locking casters if the product includes them. Place the rack on a level floor, lock the brakes after positioning, and avoid uneven or excessive loading.
Use a single clear system, such as category, size, color, or collection. Maintain consistent hangers, leave space between garments, and use a feature position for high-priority products.
Feature racks can work well near entrances when they present a focused collection or new arrivals. However, they should not block sightlines, customer pathways, or access to the rest of the store.
Perform quick visual checks weekly and a more thorough inspection monthly. Check wheels, fasteners, joints, coatings, loading balance, and any signs of bending or damage.
- Build Your Shops, "[Retail Clothes Racks 101: The Ultimate Guide to Elevating Your Store Displays]" — retail grouping, feature rack placement, cleaning, and inspection guidance. [buildyourshops.com]
- Displayarama, "[How to Setup Clothing Racks to Maximize Visual Appeal]" — garment spacing, display consistency, and avoiding overcrowding. [displayarama]
- Moduspace, "[Clothes Racks 101: A Comprehensive Guide]" — category organization, accessory displays, maintenance, and seasonal refresh recommendations. [moduspace.co]
- Simplified Building, "[Wall Mounted Clothing Racks: How To Use Them Effectively]" — wall-mounted rack applications, face-out bars, hang-bars, and store-flow considerations. [simplifiedbuilding]
- ClothesRacks.com, "[Assembly Instructions]" — product-specific assembly instructions should always be followed. [clothesracks]
- Homdox Heavy Duty Garment Rack Setup and Review, "[Assembly video]" — example of aligning adjustable rack components and measuring shelf heights during setup. [youtube]
Hot Tags: China, Global, OEM, private label, manufacturers, factory, suppliers, manufacturing company


