
Views: 246 Author: Waigaoqiao Co.,Ltd Publish Time: 2026-11-11 Origin: Waigaoqiao Co.,Ltd
Content Menu
● How Do You Adjust the Height of Wire Shelves Safely?
● Identify Your Wire Shelving Adjustment System First
● Tools and Preparation for Adjusting Wire Shelf Height
>> Inspect the Rack Before Starting
● Step-by-Step: How to Adjust Wire Shelves With Plastic Clips
>> Step 1: Empty the Entire Unit
>> Step 2: Plan the New Shelf Positions
>> Step 3: Release the Shelf Evenly
>> Step 4: Remove Obstructing Components if Necessary
>> Step 5: Reposition the Split Sleeves
>> Step 6: Lower and Seat the Shelf
>> Step 7: Inspect and Reload Gradually
● How to Choose Shelf Spacing That Actually Works
>> Measure Access, Not Just Product Height
>> Match Adjustment Increments to the Actual Rack
>> Use a Shelf-Spacing Worksheet
● Troubleshooting Stuck Shelves, Slipping Clips, and Wobbling Racks
● Load Capacity After Adjustment: What Must You Recheck?
● What OEM Buyers Should Specify Before Production
>> Turn Real Customer Feedback Into Better Instructions
● Plan Your Next Wire Shelving Project With Waigaoqiao
>> Can I adjust wire shelves without taking the whole rack apart?
>> Can I adjust wire shelving while it is loaded?
>> Why are my wire shelving clips slipping?
>> Do I need a rubber mallet to change shelf height?
>> How far apart should wire shelves be?
>> Are wire shelving replacement clips universal?
>> Can raising a shelf increase its weight capacity?
At Waigaoqiao, we believe adjustable shelving should make storage easier—not leave you struggling with stuck shelves and confusing clips. If you are asking, "how do you adjust the height of wire shelves," the basic answer is straightforward: empty the rack, release the shelf, reposition its supports evenly, and reseat it securely.
Founded in 2003, Waigaoqiao manufactures metal wire shelving and garment display racks, providing OEM services for overseas brands, wholesalers, and manufacturers. From an OEM planning perspective, useful shelving instructions must explain both the adjustment process and the checks that make the finished installation dependable.
This guide focuses on freestanding wire shelving with grooved posts and split sleeves. Quick-release systems and wall-mounted shelves work differently, so always check your model's instructions first.

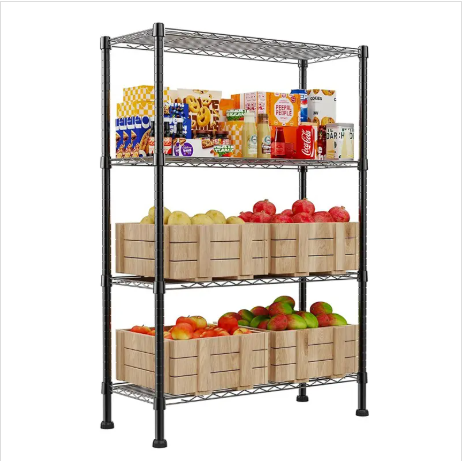
For a conventional split-sleeve wire rack, follow this sequence:
1. Remove everything from the shelving unit.
2. Stabilize the empty rack on a firm, level surface.
3. Release the shelf from its supporting sleeves.
4. Move all four sleeve pairs to matching post grooves.
5. Lower the shelf evenly onto the sleeves.
6. Check its seating, level, and stability before reloading.
The important detail is that moving a shelf is not always the same as removing it. A conventional shelf's closed corner collars surround the posts. Moving it past another shelf—or replacing it—may require partial disassembly.
Never try to adjust a loaded shelf.
*Suggested visual: Place a six-step illustrated overview here, showing the empty rack, released shelf, relocated sleeves, and completed inspection.*
Before loosening anything, inspect the connection between each shelf corner and its post.
| Shelving system | Identifying feature | Adjustment approach |
|---|---|---|
| Conventional split-sleeve rack | Tapered plastic sleeve pairs beneath closed shelf collars | Lift the shelf clear, reposition sleeves, and reseat |
| Quick-adjust rack | Dedicated release mechanism at the shelf corners | Follow the model-specific release and locking sequence |
| Add-on shelf system | Corner connections designed to open or attach around posts | Use the manufacturer's installation procedure |
| Wall-mounted wire shelving | Brackets, tracks, or wall clips | Reposition compatible supports according to the wall system |
Do not assume that "adjustable" means every shelf moves independently without disassembly.
Likewise, similar-looking replacement clips are not automatically interchangeable. Post diameter, groove profile, sleeve taper, and collar dimensions must work together.
Prepare the following:
- Your shelving model's assembly instructions.
- A tape measure and spirit level.
- Removable tape for marking positions.
- Compatible replacement sleeves, if needed.
- Work gloves suitable for handling metal components.
- A rubber mallet only if the manufacturer permits its use.
Arrange help when handling large shelves or tall racks. Clear enough space to set removed components down without bending them.
Look for cracked sleeves, bent posts, damaged collars, broken welds, and significant corrosion.
Adjustment will not repair a damaged load-bearing component. If something is defective, stop and obtain the correct replacement or manufacturer guidance.
For mobile shelving, engage the brakes and follow the instructions for stabilizing the unit. Brakes reduce rolling; they do not eliminate tipping risk.
Remove boxes, products, liners, hanging accessories, and anything that might fall.
Emptying the whole rack makes it easier to inspect connections and reduces the consequences of unexpected movement during partial disassembly.
Do not rely on a lightly loaded shelf being safe to move.
Measure the tallest item intended for each level. Add enough clearance to lift and remove it comfortably.
Then account for the shelf structure itself. The distance between support grooves is not necessarily the same as usable clearance between shelves.
Check whether the proposed arrangement preserves the manufacturer's required shelf positions and structural configuration.
Support the shelf and lift it evenly to disengage its corner collars from the tapered sleeves.
If it is stuck, confirm that the unit is unloaded and inspect all corners before applying force. Where the instructions allow it, gentle upward taps beneath the corner collar area with a rubber mallet may help release the connection.
Do not strike the wire deck, hammer the plastic sleeves, or repeatedly force one corner upward. Stop if the shelf distorts or the rack becomes unstable.
A closed-collar shelf cannot pass through another shelf.
If you must remove upper shelves, work in the disassembly order specified for your rack. Keep components organized by level and maintain control of the remaining structure.
For tall or awkward units, ask another person to help stabilize and handle the components.
Open the sleeve halves and move them to the selected grooves.
Install them in their specified orientation. If they have "TOP" markings or arrows, follow those markings. Confirm that their internal locating features engage the intended post grooves.
Set all four sleeve pairs at the same corresponding height.
Some sleeves retain a small seam when correctly installed. Do not force the halves flush unless the instructions require it.
Guide all four corner collars over their sleeves together.
Lower the shelf evenly, checking that no sleeve slips down or becomes displaced. Seat it using the method approved for your model.
Do not stand or climb on the shelf to force it into position.
Check that every collar is seated consistently and the shelf is level.
Verify that the unit stands securely, its feet or casters are correctly installed, and any required restraints remain effective.
Reload gradually. Distribute weight evenly and keep heavier goods in suitable lower storage positions.
Equal spacing looks tidy, but useful spacing depends on what people store and how they retrieve it.
A box may fit beneath a shelf yet remain difficult to remove.
Measure the item in its normal storage orientation. Include handles, lids, packaging irregularities, and the hand clearance needed for retrieval.
For example, a 12-inch-tall carton with a planned 2-inch handling allowance needs at least 14 inches of clear opening. This is a planning example, not a universal clearance requirement.
The final support position must also accommodate the shelf's underside structure.
Many commercial wire shelving systems use approximately 1-inch increments, but this is not universal.
Check the post markings and product specification. Do not assume another brand's adjustment interval applies to your rack.
| Storage category | Measure first | Layout priority |
|---|---|---|
| Folded apparel | Typical stack height and width | Easy picking without disturbing adjacent stacks |
| Cartons | Tallest carton and handling clearance | Straightforward removal and replacement |
| Small parts bins | Bin height, handles, and labels | Visible identification and comfortable access |
| Heavy supplies | Item weight and handling method | Stable storage and manageable lifting |
Photograph the finished arrangement and record groove positions. A simple layout record helps staff reproduce an approved setup.
| Problem | Possible cause | Recommended check |
|---|---|---|
| Shelf will not release | Tight collar seating, uneven lifting, or obstruction | Support evenly and follow the approved release procedure |
| One corner sits higher | Sleeves on different grooves or uneven seating | Unload and compare all four support positions |
| Sleeve moves downward | Incorrect engagement, incompatibility, or damage | Inspect the groove connection and replace unsuitable parts |
| Rack rocks on the floor | Uneven floor or incorrectly adjusted feet | Check the floor and adjust feet within their permitted range |
| Shelf bends noticeably | Excessive load, concentrated loading, or damage | Unload and inspect before further use |
Do not conceal a connection problem by simply adding more weight. Loading may make a poorly seated joint look tighter without correcting its cause.
If adjustment repeatedly fails, send the supplier clear photographs of the post, sleeve, collar, and product identification.
Changing shelf height does not increase the rack's rated capacity.
Check the limits for:
- Each shelf.
- The complete unit.
- Casters and mobile configurations.
- Required shelf placement or bracing.
- The specified loading pattern.
A shelf rating based on evenly distributed weight does not authorize placing the same weight in one small area.
Do not calculate total rack capacity by multiplying the shelf rating by the number of shelves. The complete assembly can have a separate, lower limit.
Likewise, do not transfer another manufacturer's published ratings to a Waigaoqiao product. Use the documentation for the exact model and configuration.
For brands and wholesalers, adjustment quality starts with the product specification—not the instruction leaflet alone.
At Waigaoqiao, we encourage buyers to define the intended storage arrangement and adjustment expectations during OEM discussions.
A practical specification checklist includes:
1. Post dimensions and adjustment intervals.
2. Shelf, collar, and sleeve compatibility.
3. Required shelf and complete-unit load documentation.
4. Stationary or mobile configuration.
5. Replacement sleeve identification and availability.
6. Illustrated assembly, adjustment, and inspection instructions.
When verified reviews become available, classify complaints by the step where users encounter difficulty.
"Clips keep falling" may point to unclear orientation instructions. "Shelf will not move" may indicate that the release process needs a close-up image. "Rack is uneven" may reveal confusion about matching groove positions.
These are illustrative problem categories, not reported Waigaoqiao reviews.
Use authentic feedback to improve instructions, packaging, and replacement-part information. Do not turn hypothetical examples into testimonials.
A successful height adjustment ends with a shelf that fits its contents, seats correctly, and remains within its documented limits.
For overseas brands, wholesalers, and manufacturers, clear adjustment instructions also make an OEM shelving range easier to explain and support.
Contact Waigaoqiao with your target dimensions, intended loads, installation environment, preferred finish, and adjustment requirements. Ask for model-specific component details, relevant load documentation, and assembly guidance before finalizing your specification.
Sometimes. A shelf may move within the available space between adjacent shelves. Closed-collar systems can require partial disassembly when removing a shelf or moving it past another level.
No. Empty the unit before adjustment. Stored items make handling harder and create falling-object and instability risks.
Possible causes include incorrect orientation, poor groove engagement, incompatible components, or damaged sleeves. Unload the rack and inspect the connection before using it again.
Not always. Some connections release by hand, while quick-adjust systems use dedicated mechanisms. Use a rubber mallet only where the manufacturer's instructions permit it.
Base spacing on item height, retrieval clearance, and shelf construction. Then select a supported groove position that preserves the rack's required configuration.
No. Similar appearance does not establish compatibility. Confirm the correct sleeve for the post diameter, groove geometry, and shelf collar.
No. Shelf height is not a basis for increasing capacity. Follow the documented shelf, unit, and configuration limits.
1. Company information supplied by Waigaoqiao
2. Metro — Wire Shelving & Wire Racks
[https://metro.com/wire-shelving/]
3. Metro — Instructions for Use
[https://metro.com/documents/instructions-for-use/]
4. Metro — Ultimate Commercial Shelving Buying Guide
[https://metro.com/blog/metros-ultimate-commercial-shelving-buying-guide-/]
5. Metro — Replacement Plastic Split Sleeves for Super Erecta Industrial Wire Shelving
6. Editorial scope and original recommendations
Hot Tags: China, Global, OEM, private label, manufacturers, factory, suppliers, manufacturing company


