
Views: 252 Author: Waigaoqiao Co.,Ltd Publish Time: 2026-10-08 Origin: Waigaoqiao Co.,Ltd
Content Menu
● How to Put Up a Clothes Rack: The Quick Answer
● Choose the Right Clothes Rack Before Installation
● Prepare Your Space, Parts, and Tools
● How to Assemble a Freestanding Clothes Rack Step by Step
>> Step 1: Identify Component Orientation
>> Step 3: Install Shelves or Casters When Specified
>> Step 5: Attach the Hanging Rail
>> Step 6: Align and Secure the Frame
>> Step 7: Check Stability Before Adding Clothes
● How to Install a Wall-Mounted Clothes Rack Safely
>> Confirm the Wall and Fixing Requirements
>> Measure Garment Clearance and Mark the Brackets
● Understand Clothes Rack Load Capacity
● Troubleshoot Common Clothes Rack Assembly Problems
● Plan the Layout Around Real Use
>> Home Storage
>> Retail and Showroom Displays
● What OEM Buyers Should Ask Waigaoqiao
>> Can I Put Up a Clothes Rack Without Tools?
>> Why Does My Clothes Rack Lean to One Side?
>> Can I Mount a Clothes Rack Directly on Drywall?
>> How Much Weight Can a Garment Rack Hold?
>> Can I Move a Rolling Clothes Rack While Loaded?
>> What Should I Do If Assembly Parts Are Missing?
● Plan Your Next Garment Rack with Waigaoqiao
Waigaoqiao has manufactured metal wire shelving and garment display racks since 2003, providing OEM services for overseas brands, wholesalers, and manufacturers. In this guide, we answer a practical question: how to put up a clothes rack? Start by identifying your rack type, checking its instructions, assembling or mounting it correctly, and confirming stability before adding clothes.
A clothes rack should do more than stand upright. It should fit your space, support its intended load, and remain practical during everyday use. Whether you are organizing a bedroom, preparing a showroom, or specifying racks for a retail collection, installation begins with choosing the right setup.

For a freestanding clothes rack, assemble the base, install the uprights, connect the hanging rail, align the frame, and secure all connections according to the manual. Fit any shelves or casters in the specified sequence, then check stability before loading.
For a wall-mounted clothes rack, identify the wall construction, choose an approved fixing method, mark level mounting positions, and install the brackets and rail following the manufacturer's instructions.
There is no universal assembly sequence for every design. Some racks use bolts, others use locking buttons, and wire-shelving models may use split sleeves. Your model's manual takes priority over general advice.
Freestanding racks are useful when you need storage without drilling into walls. They work well in bedrooms, temporary displays, and flexible retail layouts.
Check the footprint, hanging height, and access around the rack. Leave room for garments to hang without pressing against furniture or blocking walkways.
A rolling garment rack adds mobility, but its wheels introduce additional installation checks.
Confirm how each caster attaches and where any locking casters belong. A rack that stands securely while stationary may behave differently when moved, especially across thresholds or uneven flooring.
Do not assume its stationary load rating also applies during movement.
Wall-mounted racks preserve floor space and can create an organized display. However, their performance depends on the wall, brackets, fasteners, and installation—not just the strength of the rail.
Identify whether you are fixing into timber studs, masonry, concrete, or a hollow-wall system. These surfaces require different fastening solutions.
| Rack type | Main installation task | Critical check |
|---|---|---|
| Freestanding | Assemble base, uprights, and rail | Frame alignment and joint security |
| Rolling | Assemble frame and fit casters | Wheel attachment, locks, and movement |
| Wall-mounted | Secure brackets to suitable support | Wall construction and fastening method |
| Wire-shelving garment rack | Position sleeves, shelves, and rail | Correct engagement and level shelves |
Clear enough floor space to lay out components without scratching them. Protect finished surfaces with cardboard or a soft sheet.
Compare the contents with the parts list before beginning. Separate similar-looking screws by size rather than assuming they are interchangeable.
Depending on the design, you may need:
- The supplied hex key or spanner.
- A screwdriver suitable for the fasteners.
- A tape measure and spirit level.
- A stud finder for relevant wall construction.
- A drill, suitable bits, and specified wall fixings.
- Protective equipment appropriate to the installation.
Do not substitute missing structural hardware with a convenient spare. Contact the supplier for the correct replacement.
For large frames or wall-mounted installations, arrange assistance when needed. One person can support the components while the other aligns and secures them.
Locate the base sections, uprights, hanging rail, shelves, and connecting hardware.
Check which faces point upward and where adjustment holes or locking mechanisms belong. A reversed upright may prevent the rail from fitting even when the parts initially appear symmetrical.
Keep the instructions visible throughout assembly.
Connect the base components in the sequence shown in the manual.
For bolted frames, start the fasteners by hand to avoid cross-threading. Where the instructions allow, keep connections slightly loose until the frame is aligned.
Do not apply this approach to components that require immediate locking or full seating. Snap-fit connectors and split sleeves must engage correctly at their specified assembly stage.
Some designs require wheels or lower shelves before the uprights are fully assembled. Others place these steps later.
Follow the model-specific sequence. Forcing a shelf into a completed frame can damage fittings or make assembly harder.
For wire-shelving designs, position matching sleeve halves at the correct grooves and orientation. Follow the instructions when seating shelf corners; do not assume every sleeve system works identically.
Attach the upright posts and confirm they sit correctly in the base connections.
On adjustable racks, keep both sides at matching settings unless the design explicitly permits otherwise. Ensure locking buttons, pins, or clamps engage fully.
Never rely on friction alone when the rack includes a positive locking mechanism.
Connect the top rail without forcing it into place.
If the holes do not align, check the base orientation, upright positions, and part numbers. Misalignment usually deserves investigation, not extra force.
For telescoping rails, stay within the permitted extension range. Greater width or height does not automatically preserve the same load capacity.
Place the rack on a firm, level surface.
Check that the uprights sit correctly and the rail is level. Secure each connection as instructed, using any specified torque values.
Avoid excessive tightening. More force is not necessarily safer and can damage threads, tubes, or connectors.
Inspect every joint, adjustment point, and wheel attachment.
Check for unexpected movement without climbing on the rack, hanging from it, or applying an improvised proof load.
Add garments gradually and distribute them across the rail. Stop immediately if the frame leans, a connection shifts, or a wheel lifts unexpectedly.
Read the mounting instructions before drilling.
Where appropriate, secure the rack into structural support such as timber studs. For hollow walls, use a fastening system expressly suitable for the wall construction and the rack's loading conditions.
Do not treat a generic anchor's advertised capacity as the capacity of the completed installation.
If the wall construction or fixing requirements are uncertain, use a competent installer. Commercial displays and heavily loaded racks particularly benefit from an assessed mounting solution.
Choose the rail height around the garments you will hang.
Measure the drop from the hanger to the longest garment's hem, then allow suitable clearance underneath. Also check that hangers and shoulders will clear the wall.
Use a level to mark the bracket positions. Follow the specified spacing rather than moving brackets simply to suit an attractive layout.
Check for concealed services before drilling. Follow the fixing manufacturer's requirements for hole diameter, depth, installation, and tightening.
Secure the brackets, install the rail, and verify all retaining screws or connectors.
Do not assess capacity by pulling hard on the rail. Inspect the installation, then introduce the intended load progressively within the approved limits.
Stop using the rack if brackets move, fasteners loosen, or the wall shows cracking or deformation.
A useful specification identifies what the rating applies to.
It might describe the hanging rail, an individual shelf, the complete rack, or a particular configuration. Those are different limits.
For example, a shelf rating does not establish the capacity of the hanging rail. Similarly, adding two individually rated shelves does not automatically increase the allowable load on the frame or casters.
Before loading, confirm:
- Which component the stated rating covers.
- Whether the load must be evenly distributed.
- Whether the rating changes with height or extension.
- Whether loaded movement is permitted.
- Whether accessories share the same overall capacity limit.
The manufacturing perspective is straightforward: tube strength alone does not determine performance. Joints, base geometry, wheels, brackets, and wall fixings all matter.
For OEM buyers, request specifications for the completed configuration you intend to purchase.
| Problem | Possible cause | Recommended response |
|---|---|---|
| Rack wobbles | Uneven floor, misalignment, or loose joints | Unload it and inspect the base and connections |
| Rail will not fit | Reversed parts or mismatched settings | Recheck orientation and adjustment positions |
| Shelf sits unevenly | Sleeves positioned at different levels | Reassemble according to the shelf instructions |
| Wheels resist movement | Engaged locks, obstruction, or unsuitable surface | Check brakes, attachments, and floor conditions |
| Wall bracket moves | Unsuitable fixing or installation problem | Stop loading and obtain an installation assessment |
| Tube bends or joint cracks | Damage or overload | Stop use and contact the supplier |
Do not straighten a damaged structural component and assume its original capacity has been restored.
Measure the rack with garments hanging, not just the empty frame. Sleeves, hangers, and long coats can occupy space beyond the published dimensions.
Position the rack so it does not interfere with doors or everyday circulation. A smaller rack in a suitable location can be more useful than a larger one squeezed into a corner.
Plan around the clothing assortment and customer access.
Long garments need vertical clearance. Dense displays need careful load distribution. Mobile racks need routes that suit their wheels and permitted operating conditions.
An illustrative showroom brief might specify long dresses, frequent layout changes, and a narrow storage area. Those requirements should inform rail height, base dimensions, and caster selection before production—not after delivery.
Waigaoqiao's OEM offering allows overseas buyers to discuss wire shelving and garment-rack designs around their requirements.
A useful enquiry should include:
- Intended market and application.
- Overall dimensions and garment clearance.
- Required rail, shelf, and total load specifications.
- Stationary or mobile use.
- Finish and accessory requirements.
- Packaging and assembly-document expectations.
Ask for an approved drawing, sample review, and instructions matching the final product.
Assembly usability deserves attention alongside appearance. Clearly identified parts, accessible fasteners, and understandable diagrams can make installation easier.
Any claims about assembly speed, durability, or customer satisfaction should be supported by actual testing or verified feedback.
Some designs use tool-free connectors; others require supplied tools. Check the instructions before purchasing or assembling. "Tool-free" does not remove the need to inspect connection security.
Possible causes include unequal height settings, incorrect assembly, uneven flooring, loose connections, or damage. Remove the clothes before investigating. Stop use if a structural component is bent or cracked.
Do not assume drywall alone provides suitable support. The installation needs a fixing solution appropriate to the rack, wall construction, and loading conditions. Structural support or professional assessment may be necessary.
Use the rating for the exact model and configuration. Check whether it applies to the rail, shelves, or whole rack. Never transfer a capacity figure from another product.
Only when the manufacturer permits it under the relevant conditions. Follow the movement instructions, check the route, and reduce or remove the load when required. Wheel locks do not increase structural capacity.
Pause assembly and contact the supplier with the model details and missing part numbers. Do not replace structural hardware with unverified substitutes.
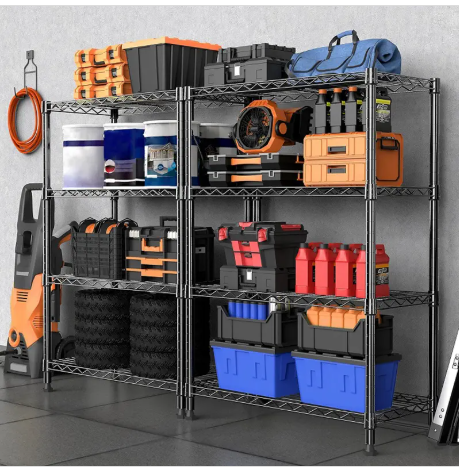
For overseas brands, wholesalers, and manufacturers, a successful clothes-rack project starts with a clear specification.
Send Waigaoqiao your target dimensions, intended garments, load requirements, mobility needs, and preferred finish. Request an OEM discussion covering the design, sample, packaging, and assembly documentation before confirming production.
Hot Tags: China, Global, OEM, private label, manufacturers, factory, suppliers, manufacturing company


