
Language
Views: 247 Author: Waigaoqiao Co.,Ltd Publish Time: 2026-11-09 Origin: Waigaoqiao Co.,Ltd
Content Menu
● How to Make a Clothes Rack: Start with the Right Design
● Plan Your DIY Clothes Rack Around Your Wardrobe
>> Measure hanging clearance before choosing the height
>> Choose proportions before buying pipe
● Choose Materials for a Freestanding Clothes Rack
>> Protect clothing from unfinished metal
● Tools and Materials Checklist
● How to Build a Clothes Rack Step by Step
>> Step 1: Prepare and inspect the components
>> Step 2: Assemble the two supporting feet
>> Step 3: Position the lower-rail connectors
>> Step 4: Install the uprights
>> Step 5: Connect the lower brace and hanging rail
>> Step 6: Tighten and inspect
>> Step 7: Introduce clothing gradually
● Clothes Rack Stability: What Basic Tutorials Often Miss
>> Strength and resistance to tipping are different
>> No universal DIY load rating exists
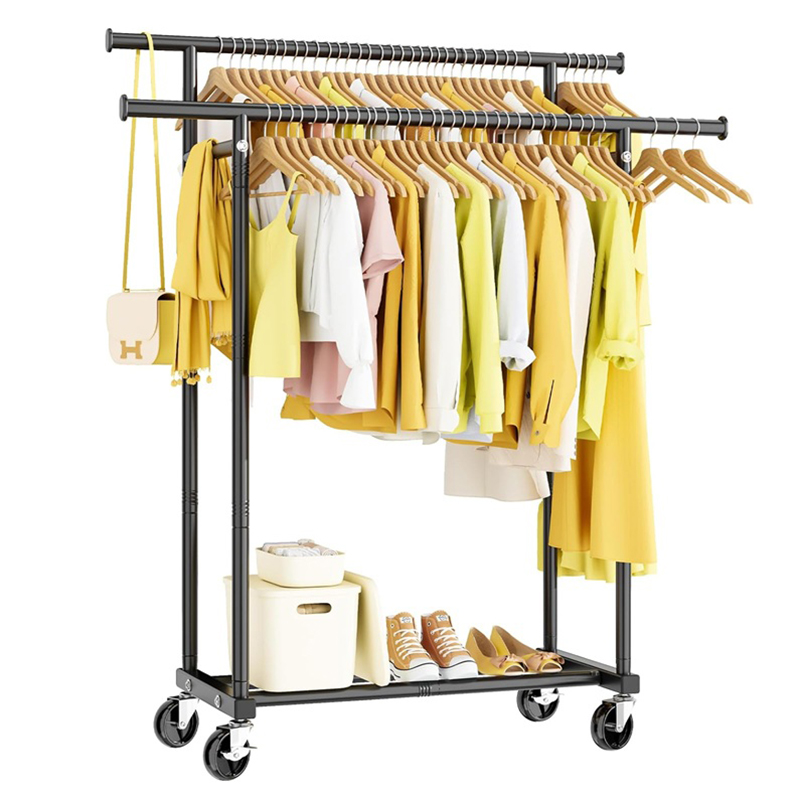
>> Adding wheels creates a different design
● Improve the Rack Without Complicating It
>> Reduce snagging before adding accessories
>> Treat shelving as a design change
● DIY or OEM Manufacturing: Which Route Makes Sense?
>> What is the easiest way to make a clothes rack?
>> Can I make a clothes rack without welding?
>> How tall should a DIY clothes rack be?
>> Why does my homemade clothes rack wobble?
>> Can I use plumbing pipe for a clothing rack?
>> Should I build a rack or order a custom one?
At Waigaoqiao, we believe a useful clothes rack starts with the garments it needs to hold—not simply the pipes available at a hardware store. Established in 2003, we manufacture metal wire shelving and garment racks and provide OEM design collaboration. This guide explains how to make a clothes rack with a practical focus on space, assembly, fabric protection, and stability.
For homeowners, a DIY rack can create additional hanging space. For brands, wholesalers, and manufacturers, it can also help clarify a product concept before discussing an OEM design.
The most important principle is stability. A rack should do more than look straight when empty: its base, joints, hanging rail, and intended use must work together.

The basic process is straightforward:
1. Measure your space and garments.
2. Select compatible pipes and structural fittings.
3. Assemble two supporting feet.
4. Connect the uprights and lower brace.
5. Install the hanging rail.
6. Align, tighten, and inspect the assembly.
7. Add clothing gradually while checking for movement.
For this guide, we recommend a stationary, single-rail concept using compatible slip-on structural fittings with set screws.
Unlike threaded plumbing fittings, these connectors allow positioning along the pipe before tightening. However, the fitting supplier must confirm that your selected components suit the proposed freestanding arrangement.
This is a planning and assembly guide, not an engineered drawing or a certified load specification.
Hang your longest garment on its usual hanger. Measure from the top of the hanger hook to the hem, then allow clearance above the floor or any lower brace.
This avoids a common mistake: choosing an attractive rack height that leaves coats or dresses dragging.
Also measure:
- Available floor width and depth.
- Door openings and nearby furniture.
- Space needed to remove garments.
- The widest hangers you expect to use.
- Any route through which the assembled rack must pass.
Remember that clothing projects beyond the rail. A frame can fit a corner while sleeves still obstruct the walkway.
For layout planning, you might sketch an overall rack around 1,000 mm wide, 1,500 mm high, and 600 mm deep.
These are illustrative dimensions—not validated safety dimensions or final pipe lengths. Adjust them to your garments, room, and fitting system.
Connector geometry changes the relationship between pipe length and finished dimensions. Confirm socket depth, insertion requirements, and joint positions before ordering precut pieces.
Different materials suit different priorities.
| Material or system | Practical advantage | Main consideration |
|---|---|---|
| Steel pipe with structural fittings | Adjustable assembly and an industrial appearance | Heavy; requires compatible fittings and careful finishing |
| Timber | Can suit home interiors and basic woodworking | Joint design and bracing require attention |
| PVC pipe | Lightweight and easy to handle | Do not assume suitability for heavy garments or long spans |
| Manufactured garment-rack system | Defined components and repeatable assembly | Check the actual product specifications and intended use |
For the design below, use one compatible steel-pipe and fitting system.
Do not assume that a nominal pipe size equals its outside diameter. Check the fitting manufacturer's stated pipe compatibility.
If the supplier cannot provide suitable assembly guidance, choose a documented kit rather than improvising connections.
Some steel pipes arrive with protective oil or surface residue.
Clean and finish them according to the pipe and coating suppliers' instructions. Allow the finish to cure fully before hanging clothes.
Pay particular attention to:
- Sharp cut ends.
- Burrs around drilled or cut surfaces.
- Rough joints.
- Exposed fasteners.
- Coatings that rub off onto fabric.
A clean appearance alone does not prove that a surface is ready for clothing contact.
For the illustrated stationary concept, plan the following components.
| Component | Quantity | Purpose |
|---|---|---|
| Upright pipes | 2 | Support the hanging rail |
| Upper horizontal pipe | 1 | Holds hangers |
| Lower horizontal pipe | 1 | Connects the uprights |
| Front-to-back foot pipes | 2 | Form the supporting footprint |
| Compatible base tee fittings | 2 | Connect uprights to foot pipes |
| Compatible lower-rail tee fittings | 2 | Connect the lower brace to uprights |
| Compatible upper elbow fittings | 2 | Connect the hanging rail to uprights |
| Protective end caps | 4 | Cover foot-pipe ends |
You will also need a tape measure, marker, level, appropriate hex key, and the supplier's assembly instructions.
Use deburring tools only if cutting is necessary. Wear suitable eye protection and gloves when handling unfinished pipe.
This component list describes the intended geometry. Confirm fitting orientation and compatibility with the supplier before purchasing.
Lay everything on a clean, protected surface.
Check that the pipes fit their connectors correctly. Inspect for damaged threads on set screws, distorted sockets, sharp edges, and coating defects.
If cutting pipe, measure carefully and deburr every cut. Remove debris before assembly.
Clean and finish components where needed, following the relevant product instructions.
Slide one base tee onto each front-to-back foot pipe.
Position the vertical socket so the upright will rise from the planned location. Keep both feet symmetrical.
Install protective end caps.
For a centered design, each foot should project equally forward and backward. Do not shorten the feet merely to hide them beneath clothing without reassessing the design.
Slide one lower-rail tee onto each upright before closing the upper frame.
Set both tees at the same intended height. Orient their horizontal sockets toward one another.
Keep the lower rail clear of hems and shoes. It should not create an unnecessary trip point in the surrounding circulation area.
Insert each upright into its base tee to the depth required by the fitting manufacturer.
Hold the uprights while connecting the frame; an incomplete assembly may not stand securely.
Lightly secure the connectors as instructed, leaving enough adjustment to align the frame.
Do not guess tightening torque. Use the supplier's requirements.
Insert the lower horizontal pipe into its opposing tee fittings.
Then fit the upper elbows and connect the hanging rail.
Follow the fitting system's recommended assembly sequence. Avoid forcing misaligned components together.
Before final tightening, check that:
- Both feet point in the same direction.
- Uprights are vertical.
- Horizontal rails are level.
- Pipe engagement meets the supplier's instructions.
- The frame is not visibly twisted.
Place the rack on a level surface and tighten every connection as specified.
Confirm that the feet contact the floor without rocking.
Run a cloth carefully over clothing-contact surfaces to identify snagging points. Correct defects before use.
Do not hang garments to conceal an alignment or connection problem.
Start with a small, evenly distributed selection of garments.
Watch for joint movement, rotation, excessive rail bending, or rocking. Stop using the rack if any appear.
This check can reveal obvious problems, but it does not establish a safe load rating.
Never climb, sit, swing, or allow children to play on the rack.
A rail may support clothing without visibly bending while the whole rack remains vulnerable to tipping.
Base depth, rack height, garment placement, floor conditions, and sideways forces all matter.
Keep the rack away from locations where people may pull on clothing to steady themselves. Avoid hanging heavy bags from one end.
A lower connecting rail can help control frame movement, but it does not automatically make the footprint adequate.
"How much weight can a homemade clothes rack hold?" cannot be answered from pipe diameter alone.
The complete assembly matters:
- Material and wall thickness.
- Unsupported rail length.
- Fitting design and installation.
- Joint resistance to rotation.
- Base geometry.
- Condition and intended use.
Do not copy a commercial product's capacity onto a homemade rack that looks similar.
For workplace or retail use, obtain a rack with documented suitability or have the design assessed appropriately.
Casters change the support arrangement and introduce movement, thresholds, and uneven surfaces.
Do not attach them to the stationary design as an afterthought.
A rolling rack needs compatible caster mounts, suitable wheels, and consideration of the complete loaded assembly. Locking wheels do not eliminate tipping risk.
Useful upgrades begin with smoother contact surfaces and better access—not extra hooks.
Keep protruding fasteners away from sleeves. Ensure hangers slide without catching at joints. Avoid accessories that encourage uneven loading.
A lower shelf can provide storage, but it needs its own supports and secure attachment.
Do not place a loose board across pipes and assume it forms a safe shelf.
For commercial display projects, a purpose-designed wire shelf can be discussed alongside the frame rather than added after production.
Check the rack after relocation and periodically during use.
Look for loose connections, damaged finishes, corrosion, missing caps, and changes in alignment.
Remove the rack from service if a defect affects its integrity. Tightening a visibly damaged connector is not a substitute for replacement.
A DIY clothes rack is useful for exploring dimensions, appearance, and access.
Repeated commercial production requires more: controlled specifications, consistent assembly, packaging decisions, and agreed acceptance criteria.
At Waigaoqiao, our OEM design collaboration gives buyers a way to turn a concept into a defined manufacturing discussion.
A useful inquiry includes:
- Target market and intended setting.
- Overall dimensions.
- Garment types and expected loading conditions.
- Stationary or mobile configuration.
- Finish and color preferences.
- Required accessories.
- Packaging requirements and expected order quantity.
Ask how capacity claims will be verified and what test conditions apply. Confirm details in writing rather than relying on descriptions such as "heavy-duty."
To discuss a custom garment-rack project, contact Waigaoqiao at mail@waigaoqiao.com with your sketch, dimensions, intended use, and quantity. Request a design review and quotation before finalizing your specification.
A documented kit with compatible pipes and fittings reduces component-selection guesswork. Follow its assembly instructions and stated use limits rather than combining unrelated parts.
Yes. Compatible structural pipe fittings can connect a frame without welding. Their suitability still depends on the selected components, geometry, and installation.
Measure your longest garment on its hanger and add floor clearance. Also consider reach, available space, and the complete rack's stability.
Possible causes include uneven flooring, poor alignment, loose joints, or insufficient frame restraint. Unload it before inspection; do not assume adding weight will solve the problem.
It may be usable in a compatible design, but plumbing suitability does not establish furniture load capacity. Check connections, surface condition, and the complete assembly.
Build one to explore a personal layout or prototype. Consider a documented commercial product or OEM project when repeatability, mobility, verified performance, or bulk supply matters.
- Waigaoqiao. "About Us." Source for the company's 2003 founding, wire-shelving and garment-rack manufacturing, and OEM collaboration. These are company-published statements, not independent certification. [shelves-racks]
- Waigaoqiao. "How to Build a Clothes Rack Fast & Strong with Pipe: Expert Guide." Background on pipe-rack components, finishing, and frame configuration. [shelves-racks]
- PIPE DECOR. "Building a DIY Clothing Rack: A Step-by-Step Guide," September 21, 2023. Source for pipe-cleaning, sealing, and assembly considerations; its specific kit differs from the concept above. [pipe-decor]
- Simplified Building. "DIY Pipe Closet System Built with Pipe & Fittings." Source for slip-on fittings, set-screw assembly, and planning connector placement before closing a frame. Its illustrated systems include anchored configurations, not validation of this freestanding concept. [simplifiedbuilding]
- Simplified Building. "Freestanding Clothing Rack Kit Instructions." Product-specific reference illustrating why caster installation requires a compatible mounting arrangement. [cdn.simplifiedbuilding]
Hot Tags: China, Global, OEM, private label, manufacturers, factory, suppliers, manufacturing company


